
![]() Estimated Read Time: 3 minutes
Estimated Read Time: 3 minutes
Sections in this article:
For background on workflows, see Kanban Workflow Engine - An Introduction
Introduction
Transitions are the rules that guide cards from one phase to the next, automating the workflow based on conditions.
By establishing transition rules, you determine when and where to move cards based on actions or conditions met.
Note: Users require the Workflow Administrator or Local Workflow Administrator permissions to configure workflow transitions.
Configure a Workflow Transition
To configure workflow transitions, follow the below steps:
- Open the relevant Workflow.
- Click on the phase title to edit it.
- Click the Transitions section.
%20(1)-png.png?width=670&height=468&name=%F0%9F%91%B7-Vendor-Onboarding-%F0%9F%91%B7-Gatekeeper%20(6)%20(1)-png.png)
Configure a Simple Transition
- Select the Simple radio button.
- Select the appropriate radio buttons to determine which phase a workflow card should move to for each default transition you are presented with. For example, if the card is rejected, it could be moved to the workflow end.
- Click Update to save your changes.
Configure a Conditional Transition
Conditional transitions allow you to dynamically route cards through different phases of a workflow based on predefined conditions. This ensures that each card follows the appropriate approval path according to its specific attributes.
For example, in a Review Phase within a contract approval workflow, all approved cards that have an annual value exceeding $1M could be moved to a CEO Review phase, while cards that have an annual value less than $1M could be moved straight to the final approved stage.
Note: You can use date-based custom fields and expiry-based file fields to trigger transitions, for example to escalate cards to a different phase or auto-route based on milestone or review dates.
To configure conditional transitions:
- Select the Conditional radio button.
- Click Add Transition.
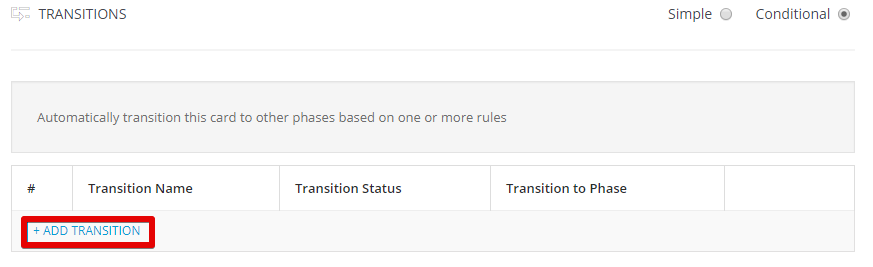
- Enter a name, then click Create.
- Click Add to create a condition.

- Select the required values from the dropdown lists. For example:
- Field = Card Approval Status
- Operator = equal to
- Data = Approved
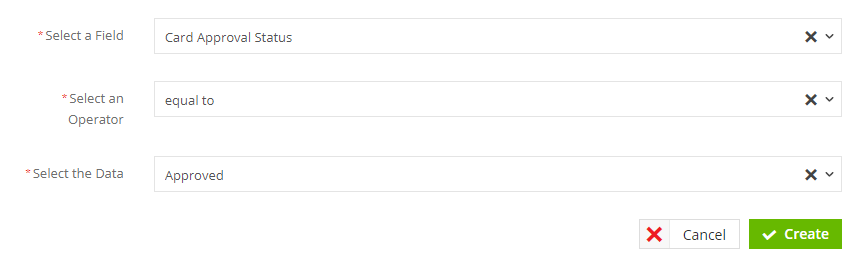
- Click Create.
- Repeat steps 4-6 to continue adding conditions. For example, you could now add a condition for Field = Contract Value, Operator = greater than, and Data = 1M.
- Click the Pencil Icon next to Transition to Phase, and select what phase the card will be routed to when the conditions are met, then click Save.
- Click the Pencil Icon next to Transition Status and select Live, then click Update.
Note: Transition rules can be combined using the AND or OR operator:
- AND: all specified conditions must be met for the transition to occur.
- OR: only one of the specified conditions must be met for the transition to occur.