
![]() Estimated Read Time: 6 minutes
Estimated Read Time: 6 minutes
Sections in this article:
- Create a Vendor Record
- Populate Data Automatically with AutoBuild
- Populate Data Manually
- Add Core Vendor Data
- Vendor Dates
- RAG Status
- Owners
- Relationships
- Custom Tabs
This article will walk you through how to manually add individual vendor records to your Gatekeeper repository. This is the simplest way to add new vendors to Gatekeeper, but it is only recommend if you are dealing with small volumes of records.
For more methodical and scalable ways to add your vendors, see the Additional reading articles below.
Note: Users require the Administrator role to create a vendor directly in the repository.
Create a Vendor Record
To create a new vendor record:
- From the navigation menu, expand the Vault, then click Vendors.
- Click Add, then select Vendor.

This will create a blank contract record for you to populate. Once you are happy with the data in each section, click Save & Next to move on.
Populate Data Automatically with AutoBuild
AutoBuild is our native integration with Clearbit which you can leverage to speed up the data population process.
With AutoBuild enabled, you must enter the Website URL as the first step of populating the blank vendor record.
Then, Gatekeeper automatically populates core data for you and unfreezes the remaining fields, allowing you to continue populating and amending the data:

If you are not using AutoBuild, when adding a new vendor, Gatekeeper will immediately allow you to start populating fields without requiring a Website URL.
If using Market IQ Financial, you can connect the vendor to CreditSafe using the data from AutoBuild.

Configure AutoBuild
To determine whether AutoBuild is enabled when creating new vendor records, follow the below steps:
- From the navigation menu, expand the Settings option, then click Configuration.
- Click AutoBuild.
- Enable or disable the AutoBuild and AutoBuild for Vendors toggles as required to switch the feature on/off.

When AutoBuild is enabled, Gatekeeper will add a Vendor AutoBuild metadata group to your data model. This is a prebuilt set of fields which can be automatically populated with details about your vendor directly from Clearbit.
Note: If there are some fields from this section you do not wish to keep, they can be deleted from the Custom Data section of Configuration.

Dismiss AutoBuild
If you don't want to use AutoBuild on a specific record, click enter data manually.

Populate Data Manually
For further details on Gatekeeper's core data, see Core Data Model Tables.
Whether using AutoBuild or not, once in edit mode, you can enter or adjust values manually as needed.

Add Core Vendor Data
In the Vendor Data section, several core data fields need to be populated to create a the vendor record:
- Vendor Name
- Status
- Type
- Approval
In addition, the following non-mandatory fields are available to capture additional information:
- Legal Name
- Registered Address
- Company Number
- Tax ID
- External ID
- Website

Click Save & Next to continue populating more data in the remaining sections, and at any point click Save and Exit to store the current metadata and exit the editor, taking you to view the new vendor record.
Vendor Dates
In this section, you can populate key dates for the contract:
- Financial Year End - The financial end-of-year for this vendor
- Relationship Since - The date of the beginning of your relationship with this vendor
If you have added custom data fields to the predefined Vendor Dates custom group, these will also appear on this section.
RAG Status
In this section, you can apply a Red, Amber, or Green status to the vendor and add a description to explain the rationale behind the decision. This can be used to track a vendor's performance.
Owners
Vendor owners are used to identify key people relating to the vendor:
- Internal Manager - The internal Subject Matter Expert of the vendor within your business
- Vendor Manager - The main point of contact (external) within the vendor's business
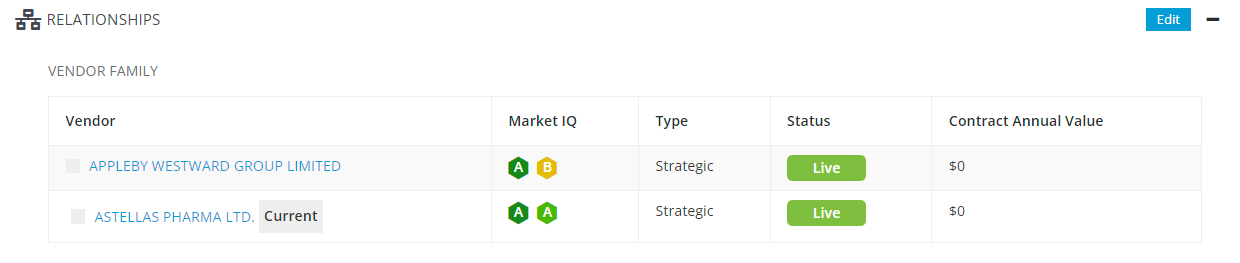
Relationships
Relationships allow you to link the vendor record to another vendor record within Gatekeeper, for example, if you want to store details about a company and any subsidiaries/sister companies, you can add them as separate vendor records and add relationships. See the below video for a demonstration:
💡 If you have Market IQ Cyber & Financial, these risk scores will also display within the Relationships tab.
When the vendor record is in edit mode:
- From the Relationships section, click Add.
- Search for and select the vendor you wish to link to.
- Select the Relationship Type
- If you selected Linked, enter a Description if required.
- Repeat steps 1-3 for all vendors than need to be linked, then click Save & Next or Save & Exit.

Relationship Types
Linked - A standard link between two vendor records. Best used when two vendors are of equal within a hierarchy, or the relationship type does not fit within the parent/child model.
Parent - The vendor from the dropdown list will become the parent of the vendor record currently being edited
Child - The vendor from the dropdown list will become the child of the vendor record currently being edited
Custom Tabs
If you have created custom tabs to store additional metadata in your vendor data model, these will appear as additional sections.
For more information this feature, see Custom Tabs.
Additional Reading 📚
Other ways to add vendors to Gatekeeper
📖 Import and Export Vendor Data - If migrating a large amount of vendors (e.g. from another repository), you can import a spreadsheet in csv format to create vendors in bulk.
📖 Vendor Portal Self Registration - If using the Vendor Portal, you can allow vendors to set up their own vendor records and user profiles.
🛠️ Create Your Own - Vendor Onboarding Workflow - Once your repository is set up, we recommend ensuring any new vendors go through a thorough onboarding and due diligence process. You can build and configure this workflow using our templates.
🛠️ Create Your Own - Touchless NDA - You can build this workflow to allow your vendors to set up their own vendor records and user profiles as part of a process to generate and sign a new NDA contract.
Other settings to be aware of
📖 Configuring Additional Owners - Learn about how to configure additional owners to capture more stakeholders involved in your vendor relationships.
📖 Configuring Custom Data - Learn how to configure additional fields to store metadata about your vendors which is not covered by our core data model.