
Sections in this article:
API Overview
The Gatekeeper API uses the RESTful (Representational State Transfer) architecture and the JSON:API specification. JSON:API defines how a client should request that resources are fetched or modified, and how a server should respond to those requests. It minimises the number of requests and the amount of data transmitted between client and server, without compromising readability, flexibility, or discoverability.
Custom data groups configured in Gatekeeper are also supported within the API. The API and its documentation adapt automatically to any changes made to custom data in the Configuration area.
Integrate with Gatekeeper Using the Postman Collection
Our Postman Collection can be used to streamline API testing and integration with your Gatekeeper tenant. The collection provides a set of pre-configured requests, making it easier to connect to and interact with a Gatekeeper tenant without manual setup.
To access the Postman Collection and start your integration, contact your Account Director (AD), who will provide the necessary details and guidance.
Gatekeeper API Documentation
API documentation is specific to each Gatekeeper tenant. To access it, add /api_docs to the end of your tenant URL, directly after the four-digit tenant ID (e.g. 1234 in the example below). This number is unique to each Gatekeeper tenant.

The API Documentation page displays your unique API key and a full list of functions for each object, with examples to get started.
Note: An OpenAPI 3.0 specification is also available for each tenant at by adding /api_docs.json to the end of your tenant URL.
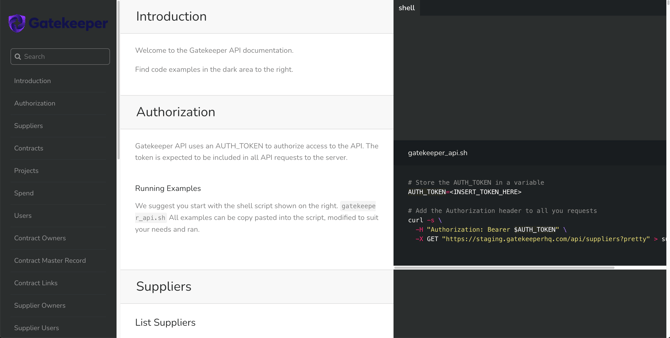
Note: Integration with external systems should only be attempted by users with the appropriate technical training. If you require technical support, contact our support team.
Manage API Keys
API keys enable external applications to interact securely with your Gatekeeper tenant. Managing your API keys is essential for maintaining security, controlling access, and ensuring compliance with cybersecurity best practices. You can:
- Generate and manage multiple API keys.
- Assign permissions for individual API keys to control access to specific endpoints.
- Revoke or disable keys when necessary.
To manage API keys:
- From the navigation menu, expand Settings, then click Configuration.
- Click API Keys.
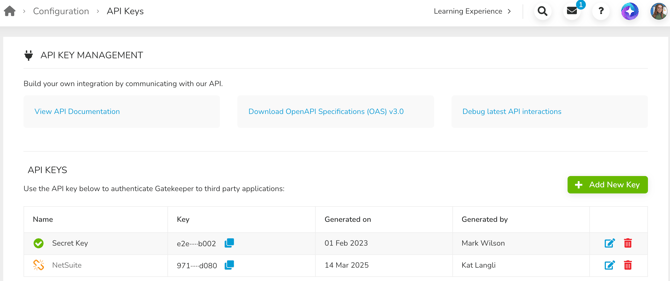
The API Keys section displays a list of your existing API keys, including details of who generated the key and when.
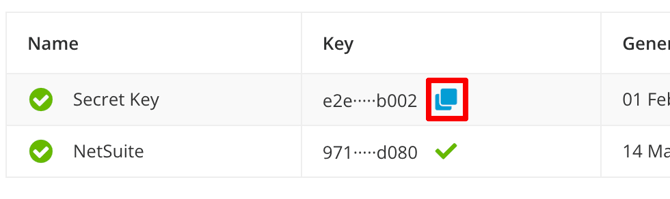
Click the copy icon to copy the key to your clipboard.
Add an API Key
To create a new API Key:
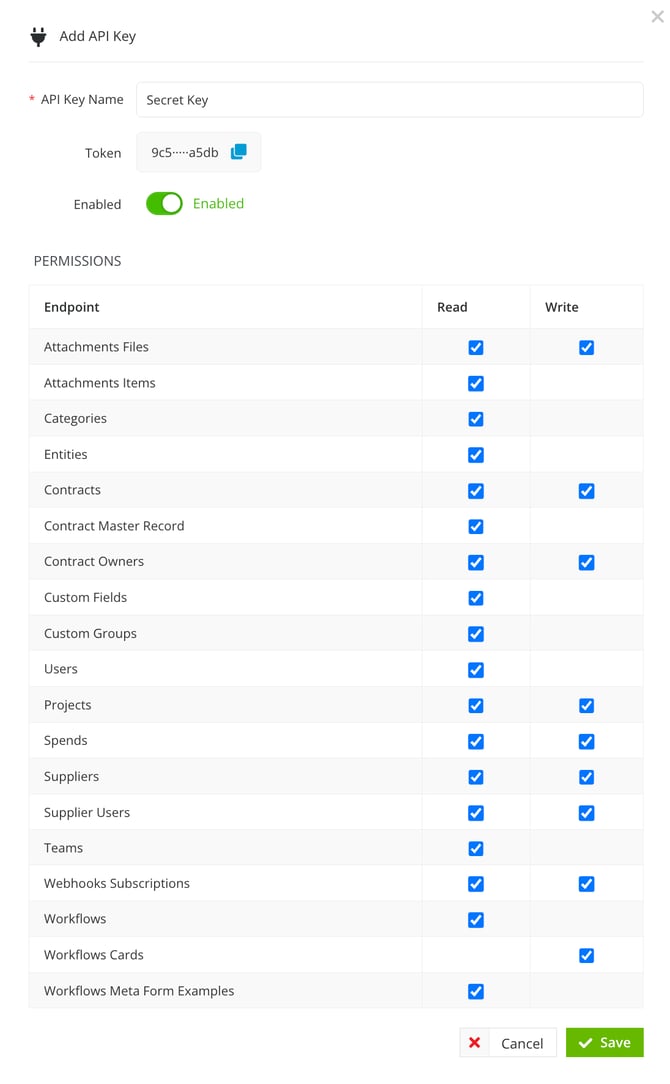
- Click + Add New Key.
- Enter a name.
- Ensure the Enabled toggle is switched on.
- Configure the permissions by selecting the appropriate checkboxes. This will determine whether read-only or write access is granted for each endpoint.
- Once finished, click Save.
Note: If the integration attempts to access an endpoint that has not been granted, an error code is generated.
Manage Existing API Keys
You can update existing API keys if required. To do this:
- Click the pencil icon on the relevant row.

- Update the name or amend the permissions by selecting/deselecting the checkboxes.
- To disable a key temporarily, switch off the Enabled toggle. This is useful when you need to pause the integration, as the key can be re-enabled later.
- Click Save to confirm your changes.
Revoke an API Key
Revoking an API key permanently removes it, so it can never be used again. This is typically done when a key is compromised or no longer needed. To do this:
- Click the delete icon on the relevant row.

- Type in the confirmation phrase and click Confirm.
Note: Revoking an API key will invalidate it and break any integrations using it. This action cannot be undone.