Estimated Read Time: 7 Minutes
Sections in this article:
- Mandatory Configuration
- Additional Configuration
- Additional Setup Outside the Workflow
- Getting Started
- Additional Reading
Introduction
This workflow allows users to request ad-hoc updates to contract records, such as amendments, early extensions or renewals, and terminations. This means you can create a structured process for requesting, reviewing, and executing updates in Gatekeeper, without needing to grant all users administrator-level permissions.
Watch the video below for a demonstration:
Workflow Diagram

Mandatory Configuration
The steps in this section outline the essential setup required to make your workflow fully functional. Complete the steps below for a fully operational, end-to-end process for requesting changes to contracts:
- Add the Contract Amendment Request workflow template to your tenant as the starting point for the build
- Assign owners for the Metadata Update and eSign phases, so the right users can perform each action
See the Additional Configuration section for optional additions that expand the scope of your process or align the workflow with your organisation's policies and procedures.
Add the Template
- From the navigation menu, click Workflows.
- Click Add, then select Workflow Template.
- Click Create on the Contract Amendment Request template.
- Amend the title if needed, then click Create.

Assign Phase Owners
The following don't have an owner configured, so you'll need to assign one for each, based on how responsibility is normally assigned in your organisation:
- Metadata Update: the owner updates the contract record with any amendments. This is typically assigned to an administrator in your organisation that manages the agreements in your Vault.
- eSign: owner initiates the eSign process, including assigning signatories and placing signature fields on the document. This can be assigned to any user that your organisation authorises to send documents for signature.
To configure phase ownership:
- Click on the relevant phase to edit it.
- From Form Access, select the relevant radio buttons to determine how ownership is assigned.
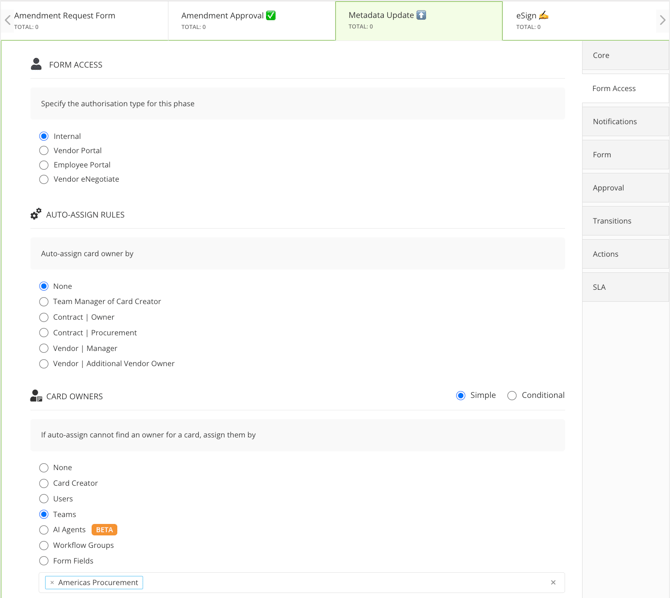
Repeat these steps until owners have been assigned for all the phases outlined above. For further details, see Configure Workflow Phase Access and Ownership.
Note: If you need to assign workflow groups as phase owners, ensure you create these first. See Manage Workflow Groups for further information.
Additional Configuration
This section covers optional steps to adjust the workflow’s scope or default settings, helping you tailor it to your organisation’s needs.
Amend Workflow Description
When using this workflow in the Employee Portal, users see a brief description within the request form on the Submit Requests dashboard.
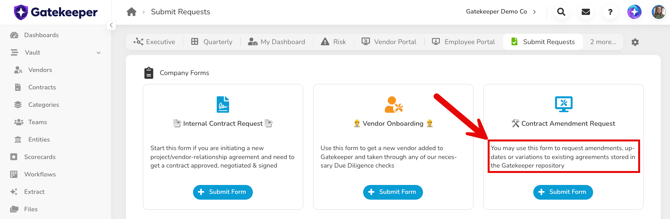
You can update this and use HTML tags to format the text, for example:
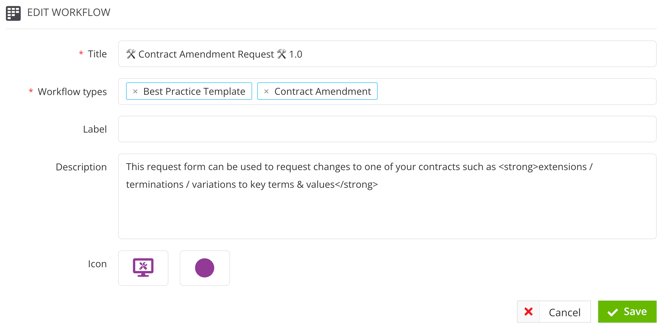
This request form can be used to request changes to one of your contracts such as <strong>extensions / terminations / variations to key terms & values</strong>
To configure this:
- From the navigation menu, click Workflows.
- Expand the 3 dots on the relevant workflow, then click Edit This Workflow.
- Enter a description.
- You can also edit the Icon/Icon Colour and Label.
- Click Save.
Amend Approvers
By default, the Amendment Approval phase is assigned to the owner of the team the requestor belongs to. You can change this, or select a backup user in case a team owner isn't available. To configure ownership:
- Click the Amendment Approval phase to edit it.
- From Form Access, select the relevant radio buttons to determine how ownership is assigned.
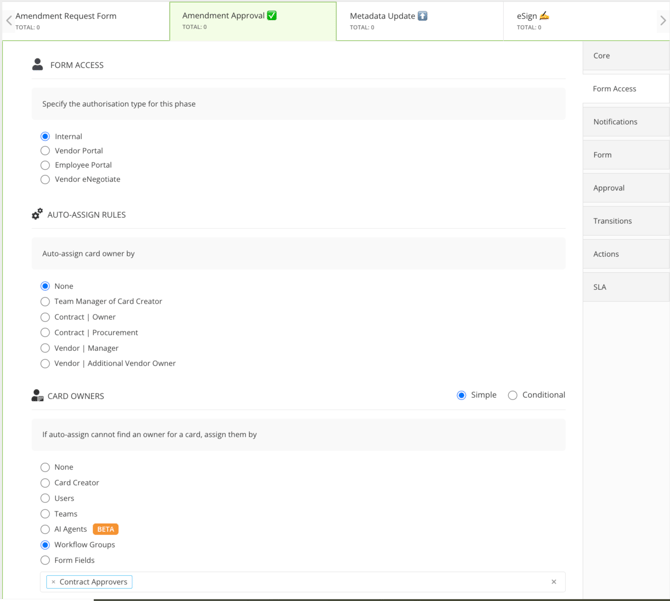
You can assign individual users, teams, or workflow groups. If you haven't already created workflow groups in your tenant, see Manage Workflow Groups for step-by-step instructions on creating groups and adding users.
Add a Resubmission Phase
By default, if the initial approver rejects the amendment request, the card moves to Amendment Rejected, ending the process. However, you can add an extra phase to let users update the form and try again rather than stopping the request entirely.
Part 1: Add the New Phase
First, you need to configure the new phase where the requestor can review and make changes to the form:
- Navigate to the right hand side of the workflow board.
- Next to New Phase, click Add.

- Enter a phase title (e.g. Review Rejection) and description if needed, then click Save & Next.
- From Form Access, select the Card Creator radio button.
- From Form, select the Editable radio button on the relevant sections.
- From Notifications, enable the email notification toggle for Card Owner, then click the pencil icon to edit the email content.
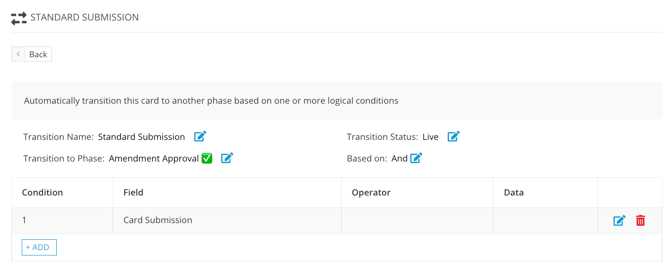
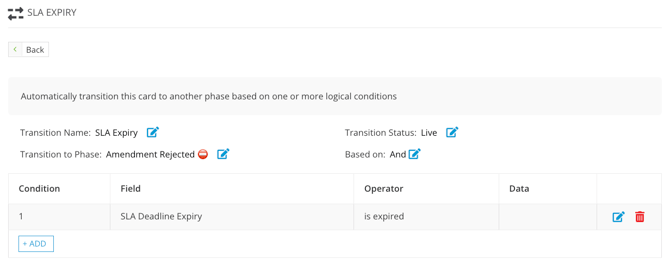
- From Transitions, select the Conditional radio button, then click Add Transition to create the following transitions:
- Standard Submission: Transition to Amendment Approval
- SLA Expiry: Transition to Amendment Rejected
- Standard Submission: Transition to Amendment Approval
- From SLA, enter a value, then select the unit (hours or days) from the dropdown list, for example 7 days.
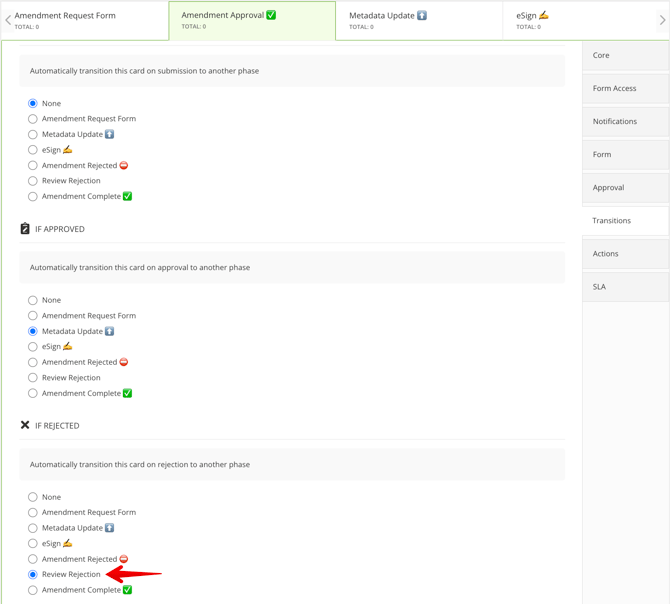
Part 2: Repoint the Reject Transition
Next, you need to reconfigure the approval phase so that rejected cards transition to your newly configured phase.
- Click the Amendment Approval phase to edit it.
- From Transitions, select the new Review Rejection phase radio button under IF REJECTED.
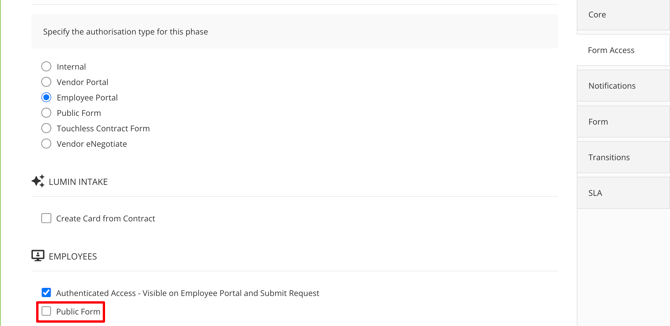
Disable the Public URL Request Form
If you are using the authenticated Employee Portal form to start the workflow, you may want to disable the Public Form to prevent users from accessing the form this way. To do this:
- Click the start phase of the workflow to edit it.
- From Form Access, deselect the Public Form checkbox.
Additional Setup Outside the Workflow
If you’ve followed all of the steps above, your workflow is nearly ready to launch. To help the process run as smoothly and reliably as possible, review the following additional areas of your Gatekeeper tenant.
Assign Team Owners
If you do not have team owners assigned, the Amendment Approval phase may not function as intended. To assign team owners:
- From the navigation menu, expand the Vault then click Teams.
- Expand the 3 dots on the relevant team, then select Edit.
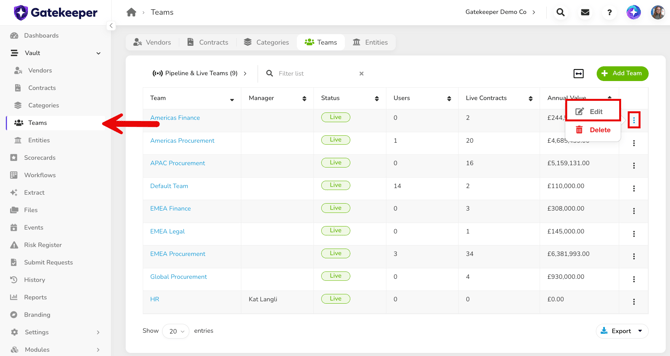
- From the Owners section, select the relevant user from the Manager dropdown list, then click Save & Exit.
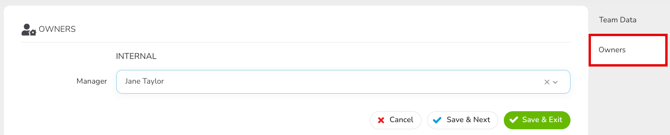
Repeat these steps until all teams have an owner.
⚡️ Getting Started ⚡️
If using the Employee Portal
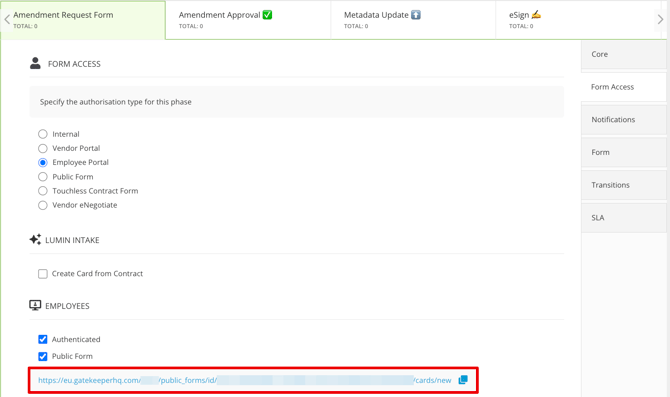
Once your workflow is configured, users can initiate a new contract amendment request via the Submit Requests dashboard. To share the form URL, right-click the Submit Form button to copy the link.
If using a Public Form
You will need to copy and distribute the form URL. To do this:
- Click the start phase of the workflow to edit it.
- From Form Access, copy the URL to share with users.