
![]() Estimated Read Time: 6 minutes
Estimated Read Time: 6 minutes
![]() Estimated Configuration Time: 5-10 minutes
Estimated Configuration Time: 5-10 minutes
Sections in this article:
- What are Public Forms?
- Configure a Public Form
- Additional Configuration to Consider
- Restrictions of Public Forms
- FAQs
What are Public Forms?
Intake and request form workflows are initiated manually by users, for example when a new contract or vendor onboarding is required. These forms collect the key data, documentation, and context about the process up front, so that approvers and other colleagues have all the necessary information.
Public Forms allow you to create a static URL that anyone can use to complete the initial form, automatically creating a new workflow card on submission.
Note: See Employee Portal Overview to learn how users benefit from a centralised requests dashboard via the Employee Portal.
Configure a Public Form
Note: To configure workflows, users must be a Workflow Administrator or Local Workflow Administrator. To learn more, see Workflow Authorisation Overview.
Once you have created the workflow and set up a form, generate the URL for users to access it:
- From the navigation menu, click Workflows.
- Click the relevant workflow to open it.
- Click the start phase to edit it.

- From Form Access, select the Public Form radio button. Your changes are saved automatically.
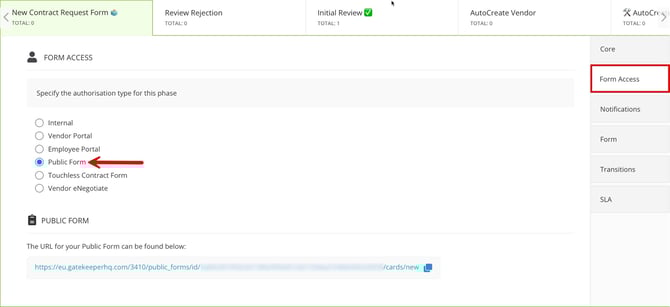
- Click the
 Copy icon to copy the URL to your clipboard.
Note: This URL is permanent and can be saved in internal documentation or a resource hub for easy access.
Additional Configuration to Consider
Update the Form Title
It's recommended to amend the title to ensure users know they are in the right place.
To update the form title:- Edit the first phase of the workflow.
- From the Core section, enter a new title. Changes are saved automatically when you click away.

Add Guidance to the Form
The Phase Description will not display to users accessing the Public Form, so it's recommended to add an introductory description for your users. To do this:
- Edit the first phase in the workflow.
- From the Form section, click Add Section.
- Enter a name, for example Instructions.
- Enter a description, and select Description Visible.
- Edit all other phases of the workflow and select the Hidden radio button for this section, so it only displays on the Public Form.
Prompt Users to Log in
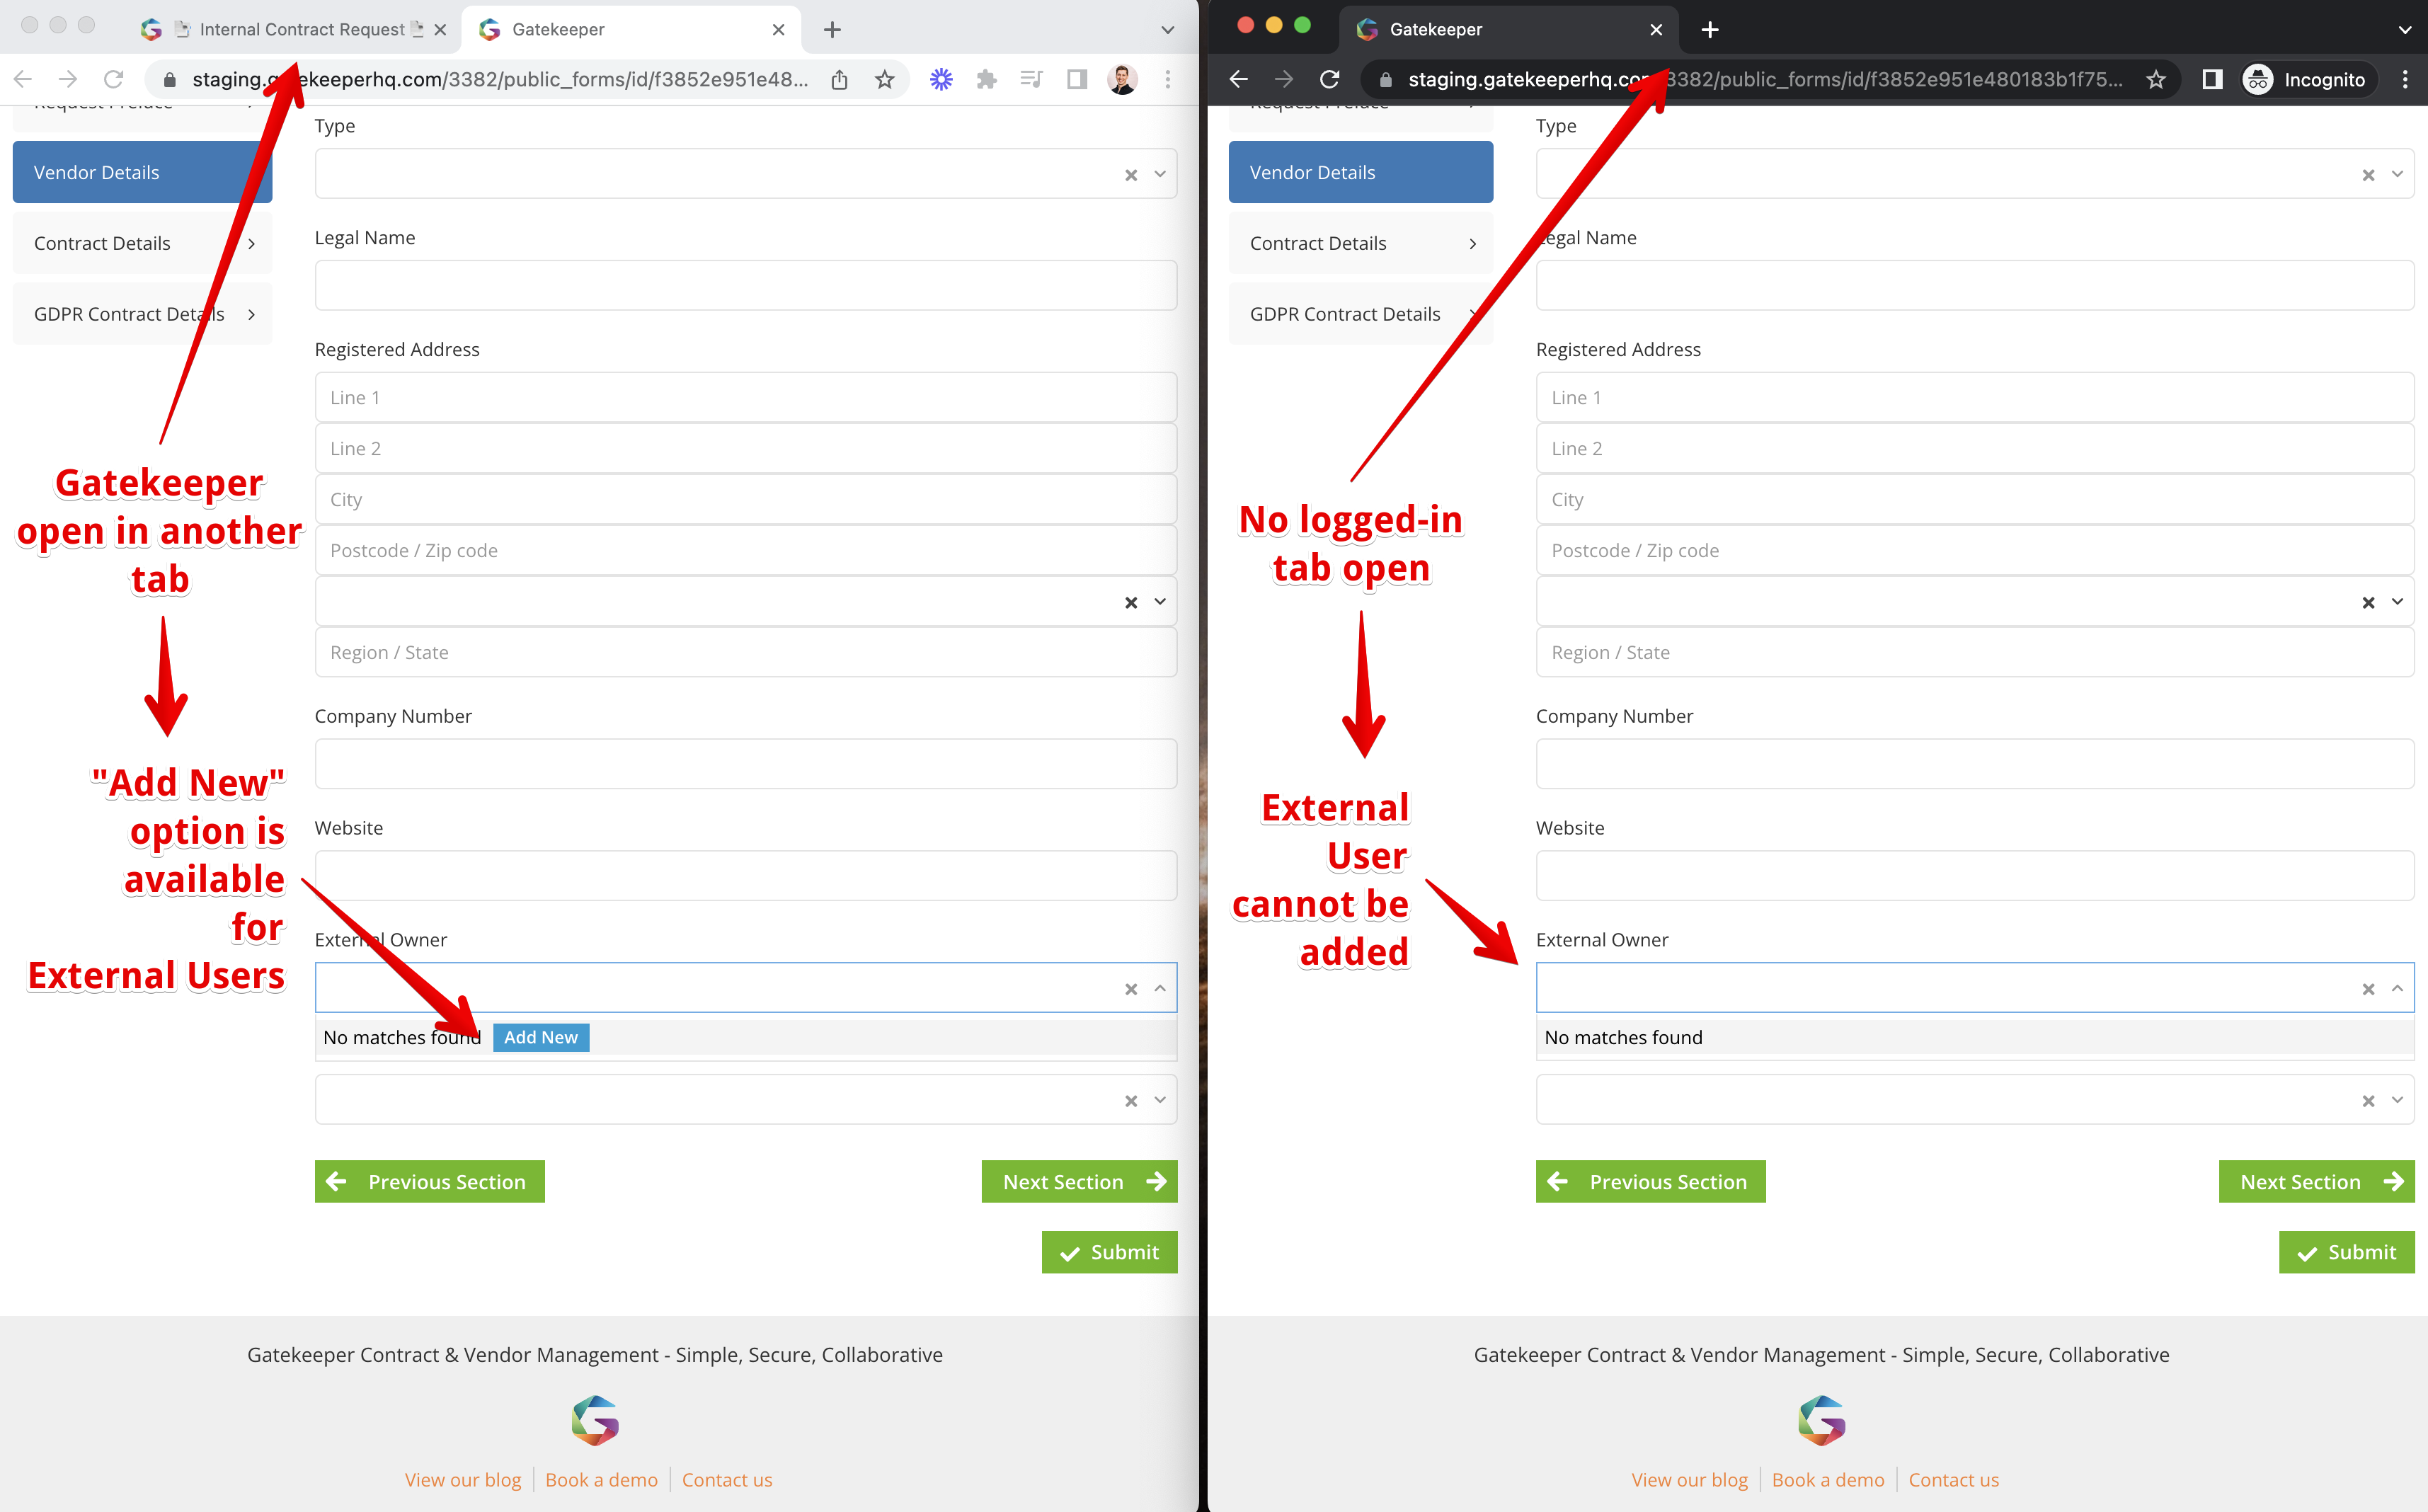
Since Public Forms are publicly accessible, some functionality available to authenticated users is restricted. To minimise these limitations, ensure users are logged in to Gatekeeper in another browser tab.
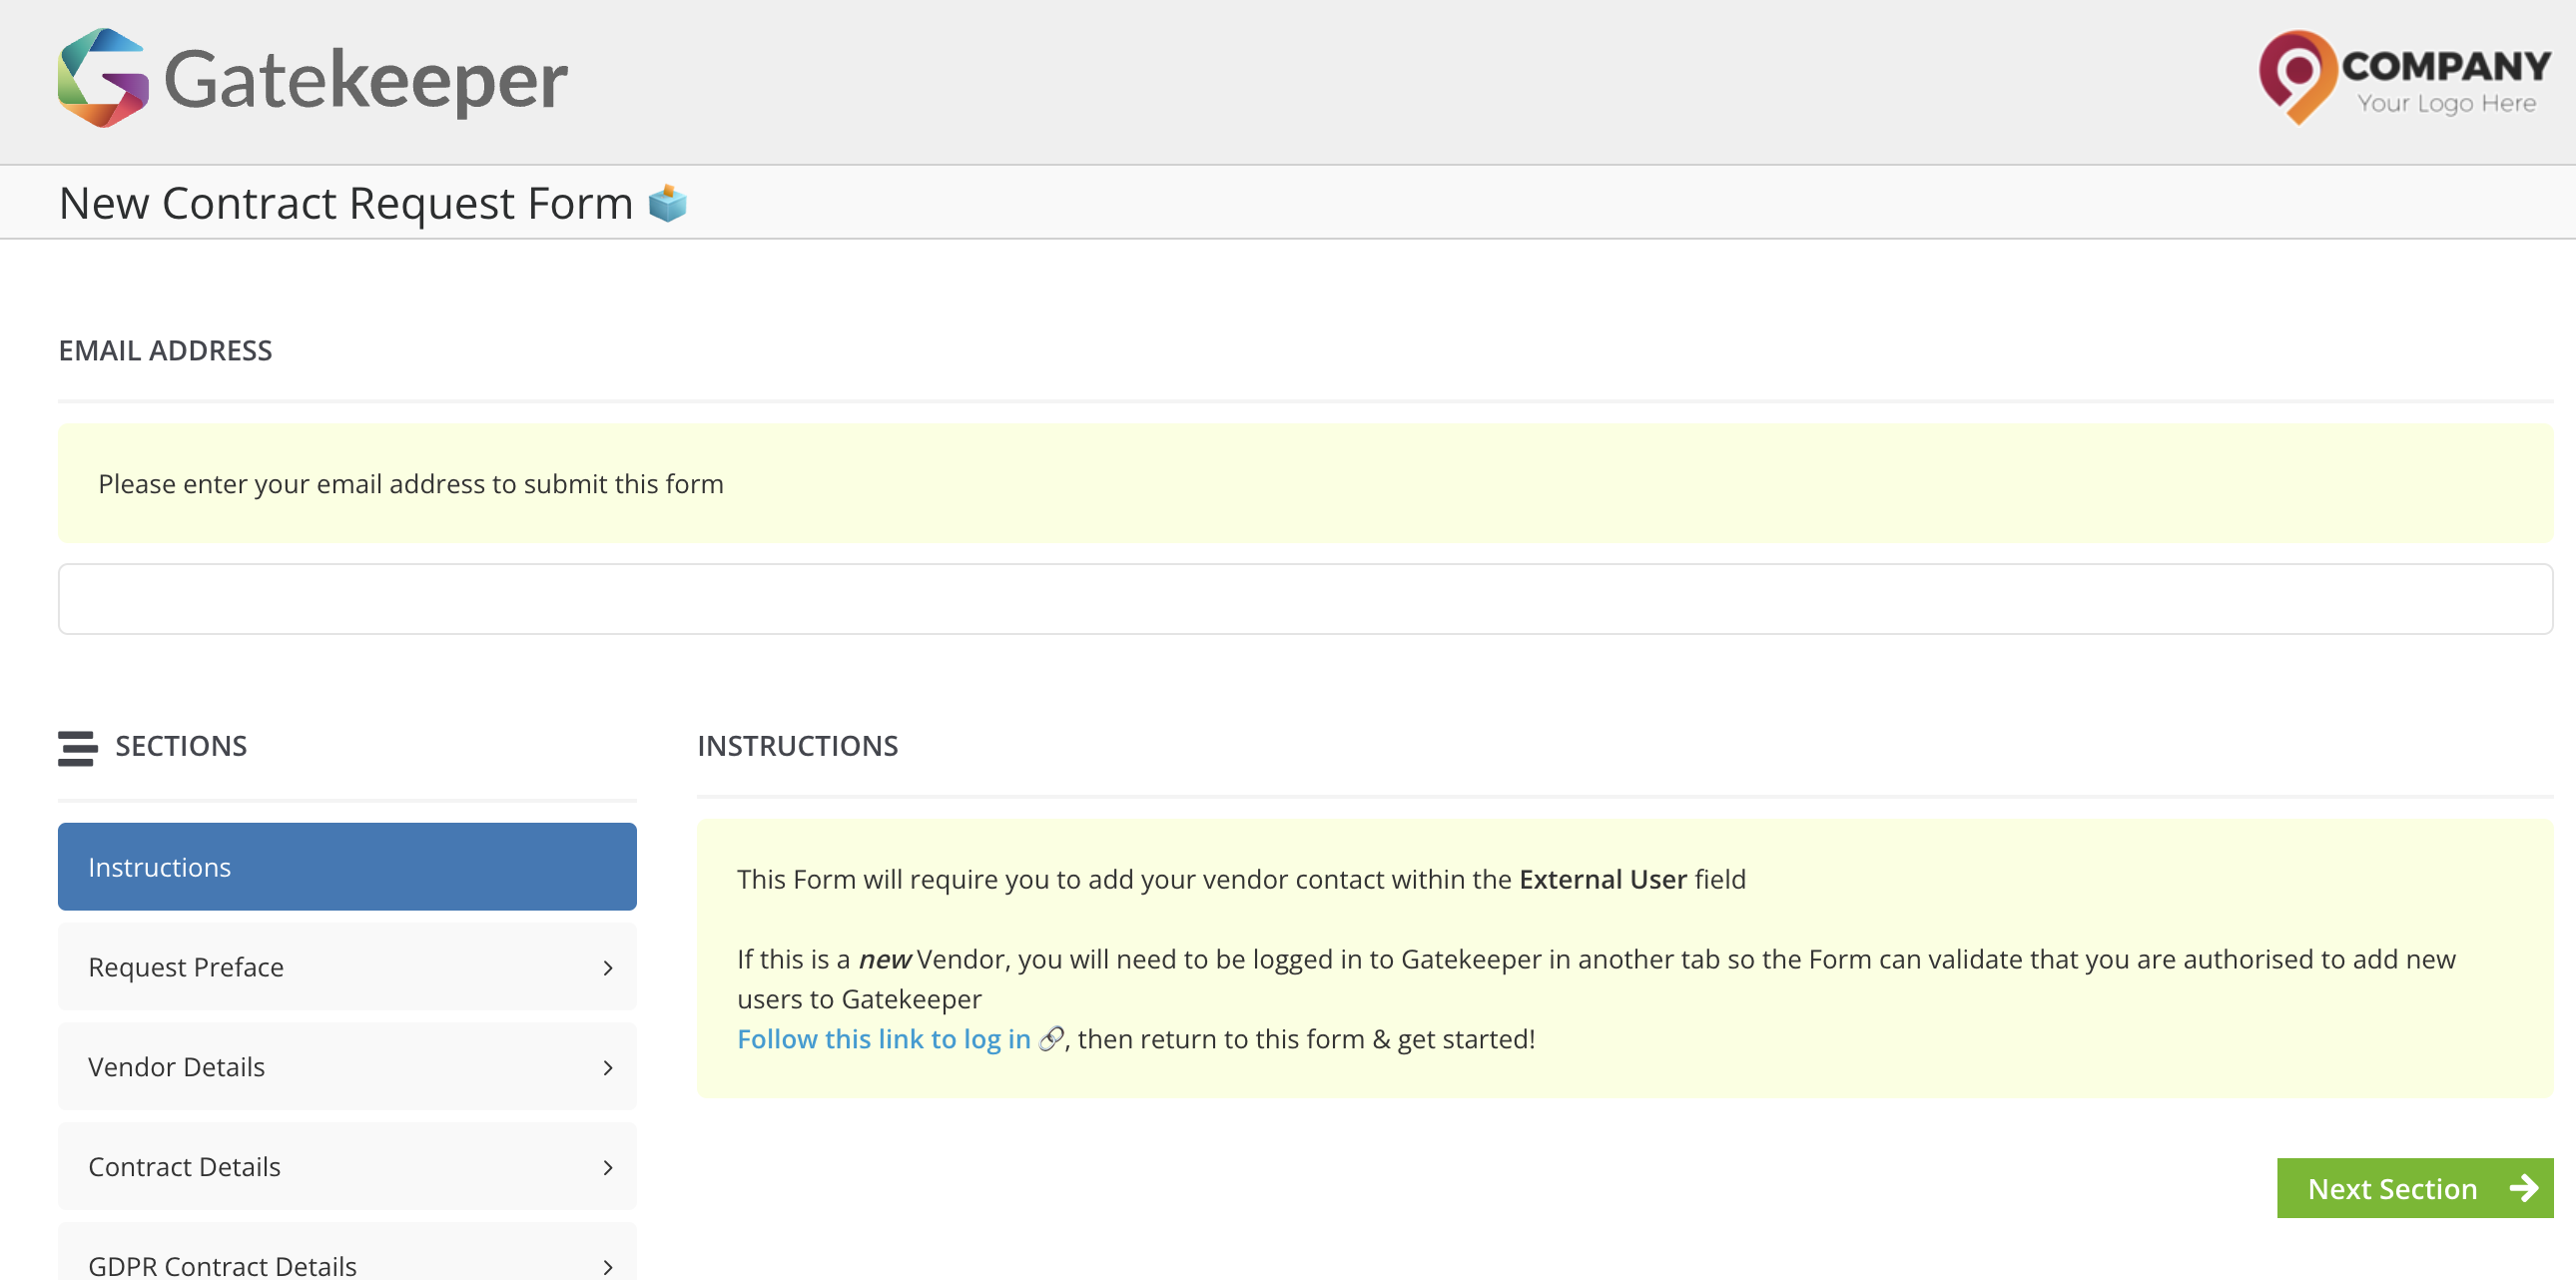
To prompt users to log in, it's recommended to add an instruction to the guidance section at the start of the form.
Restrictions of Public Forms
Auto-fill Restrictions
Since Public Form URLs are publicly accessible, certain security restrictions apply. For example, when selecting an existing vendor or contract (for example, on a Contract Amendment Request form), Gatekeeper will not auto-fill repository data to prevent unintentional exposure of sensitive information.

Using Card Creator in AutoActions
If a Public Form is submitted by someone whose email does not match a user in your Gatekeeper tenant, AutoActions may not function correctly.
In particular, the Create Contract AutoAction will fail if the AutoAction values are set to use the card creator as the internal owner, causing workflow cards to get stuck.
To prevent this, it's recommended to assign backup values by selecting Take Value From Form as well as setting a backup user. See Assigning Contract Owners for further details.
To further minimise the risk of cards stalling:
- Add a 1-day reminder email to an admin when a contract request stalls, so it can be manually corrected.
- Assign a 0-hour SLA Timer for the AutoAction phase, paired with a transition to move cards onwards when the AutoAction does not complete.
FAQs
Additional Reading 📚
- Set up a Workflow Form: A complete guide on how to build and maintain a workflow form.
- Employee Portal Overview: An overview of how you can leverage the Employee Portal to improve the request form experience for users.