
![]() Estimated Read Time: 6 Minutes
Estimated Read Time: 6 Minutes
Sections in this article:
- Part 1: Prepare Gatekeeper for Configuration
- Part 2: Configure Your IdP/AD App
- Part 3: Configure Gatekeeper
- Part 4: Test the SSO Connection
- Part 5: Restrict Access to Only Allow SAML SSO
- Renew the SAML Certificate
Note:
- Before proceeding with the configuration of Single Sign-On (SSO) using SAML v2.0, follow the recommendations in our SSO Best Practices Guide.
- When configuring SSO using our generic SAML v2.0 connector, you will need details from your Identity Provider (IdP) and once configured in Gatekeeper, you will have additional details to add to your IdP. This will likely require support from your IT/Technical team.
What you will need:
- Ensure you have at least one user set up in both your Gatekeeper tenant and your Identity Provider (IdP).
- You will need either your IdP Metadata URL, or you can use your IdP Metadata XML.
Part 1: Prepare Gatekeeper for Configuration
- From the navigation menu, expand Settings, then click Configuration.
- Click Authentication.

- Select the Allow All Authentication Methods radio button.
- Click Save.
Note: Do not select the Require SAML 2.0 authentication radio button at this stage. Without configuring and testing this setting, you may lock yourself out of your Gatekeeper tenant.
If you have done this and locked your tenant, inform our Support team here.
Part 2: Configure Your IdP/AD App
Create the custom App for Gatekeeper in your Portal.
- Email should be used as NameID in the SAML Token.
-
Your Login URL for users can be found under SSO URL in Gatekeeper. See Part 3 for further details.
Note: Gatekeeper has a dedicated oAuth feature for SSO. This means URLs for our login pages are:
auth-eu.gatekeeperhq.com when using our European instance
auth-us.gatekeeperhq.com when using our US instance
auth-ca.gatekeeperhq.com when using our Canada instance
auth-apac.gatekeeperhq.com when using our Australia/Asia-Pacific instance
This auth- URL might be what you need to use for your Base URL when configuring your app.
Part 3: Configure Gatekeeper
- From the navigation menu, expand Settings, then click Configuration.
- Click Authentication, then click Configure SAML 2.0.
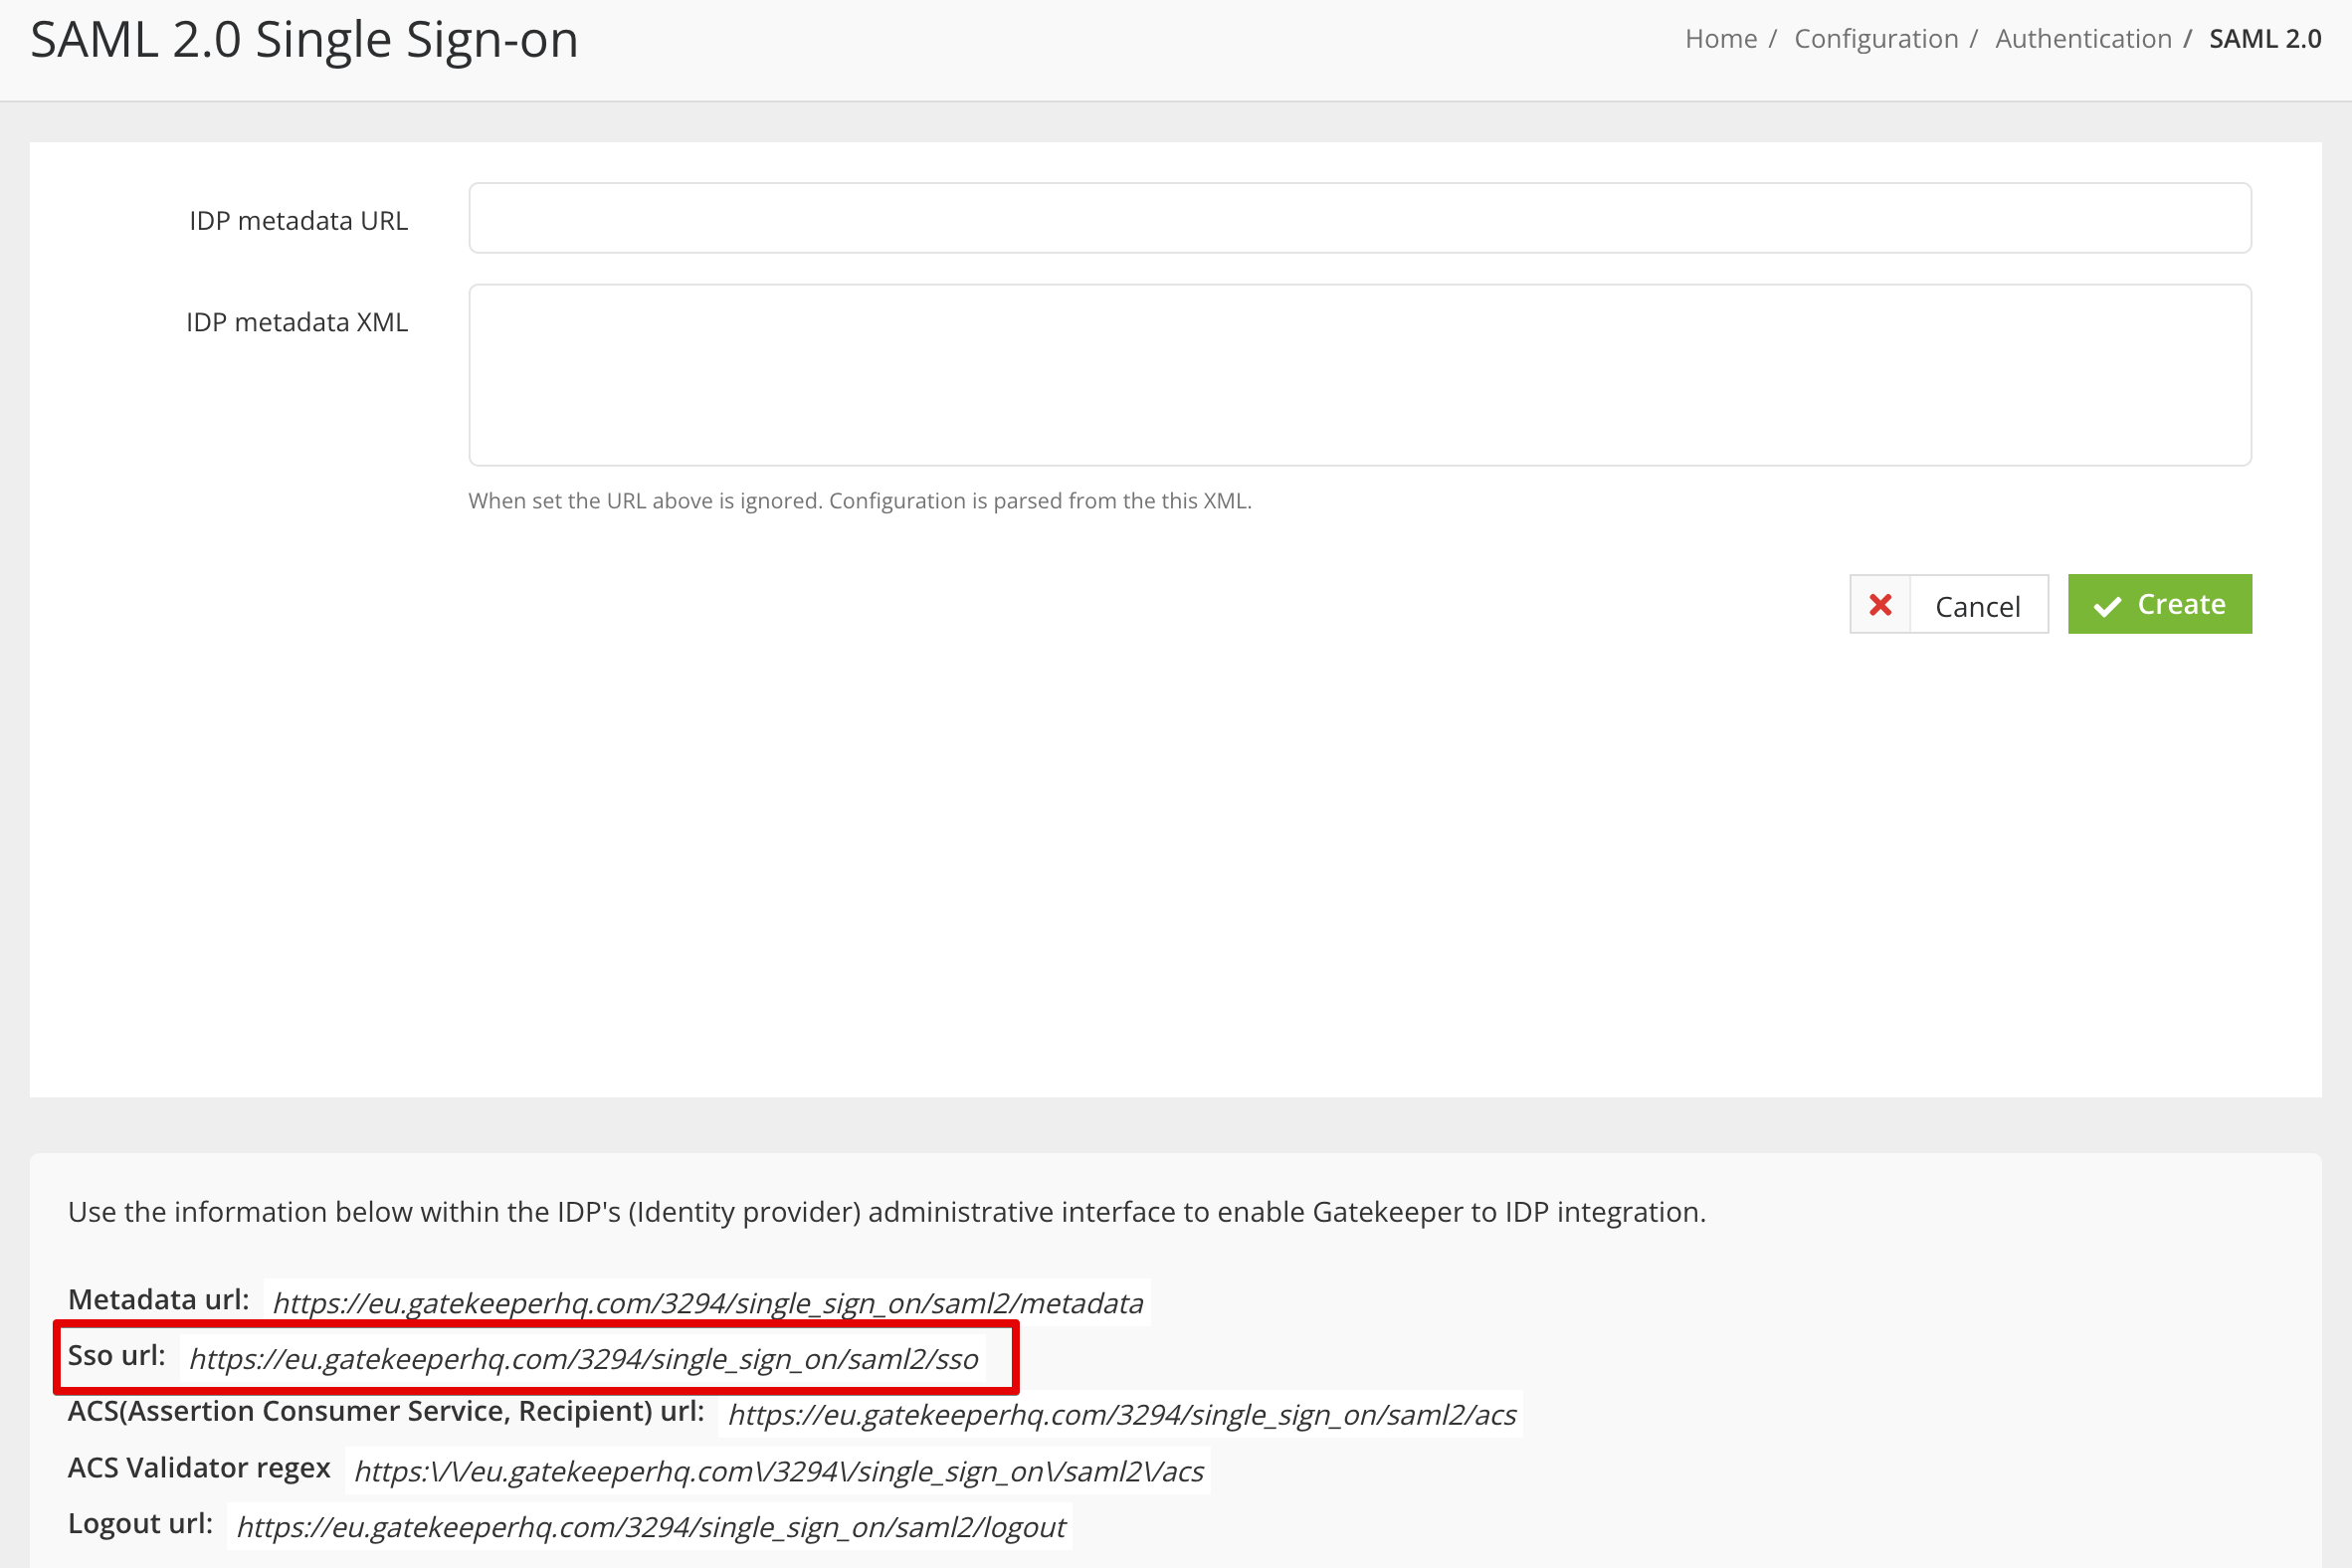
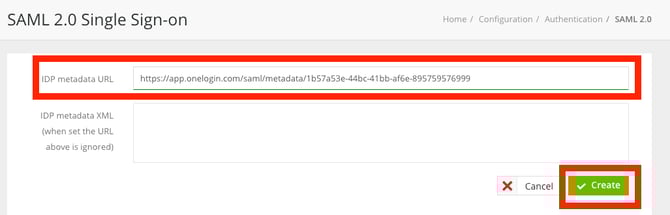
- Enter the values obtained from your IdP/AD, using either the IdP Metadata URL or XML.
- Once entered, click Create.
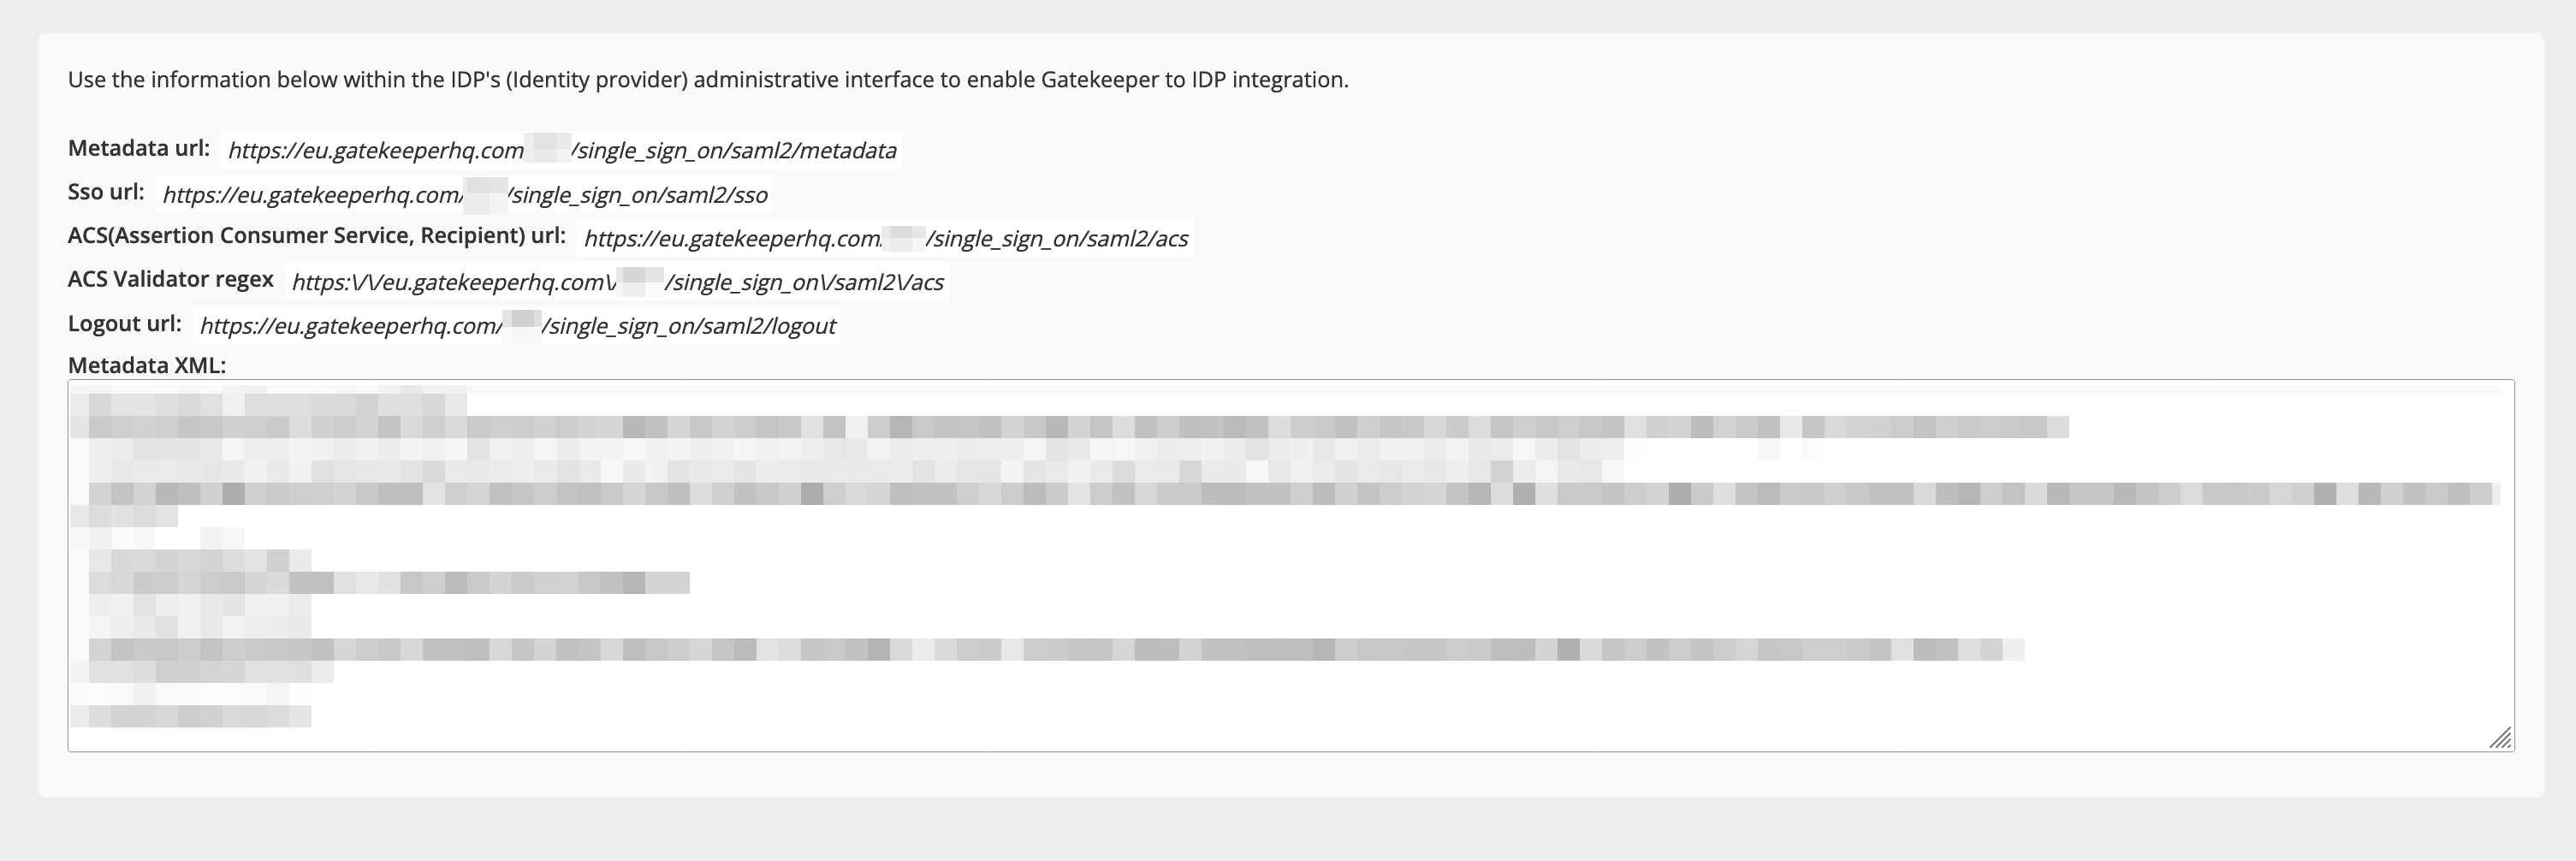
Gatekeeper will then reload the configuration page, displaying the information that was retrieved from the URL/XML entered,
This will also provide the necessary Metadata to complete the configuration of your SAML v2.0 SSO integration within your IdP:
Part 4: Test the SSO Connection
- Log out of Gatekeeper.
- On the log in screen, click LOGIN WITH SSO.

- Enter your credentials and sign in.
When troubleshooting login issues, verifying the case sensitivity of both the email address and password is essential.
Note: It's recommended to verify if other users can log in successfully by checking their login history. To find this, from the navigation menu, expand Settings, then click Users. Click on a user's name, then go to the Logins tab.

Part 5: Restrict Access to Only Allow SAML SSO
After testing the SAML SSO configuration, you can restrict access to only allow this as the login method for your users.
- From the navigation menu, expand Settings, then click Configuration.
- Click Authentication.
- Select the Require SAML 2.0 authentication radio button.
- Enable the Support Access toggle to allow tenant users with the @gatekeeperhq.com domain to bypass your SSO authentication requirements, so that they can assist with any support enquiries related to your tenant. It is strongly recommended to enable this.

- Enable the Support Access toggle to allow tenant users with the @gatekeeperhq.com domain to bypass your SSO authentication requirements, so that they can assist with any support enquiries related to your tenant. It is strongly recommended to enable this.
- Click Save.
If you restrict your Gatekeeper tenant to only allow login via SAML SSO, the other options will remain on the login screen, but users will not be able to use them. Ensure that all users are aware of the correct login method to avoid access issues.
Renew the SAML Certificate
If you need to replace the SAML certificate, follow the steps below. The exact process will vary depending on your Identity Provider:
- Navigate to your IdP’s SAML or Single Sign-On configuration area.
- Locate where SAML certificates are managed, and generate a new certificate.
- Copy your IdP’s Metadata URL (often labelled Metadata Endpoint, or IdP Metadata URL).
- Return to Gatekeeper, then from the navigation menu, expand Settings and click Configuration.
- Click Authentication, then click Configure SAML 2.0.
- Paste the copied URL into the IDP metadata URL field, then click Update.
- Alternatively, click Delete, then Save. You can then paste the copied URL into the IDP metadata URL field, then click Create.
Gatekeeper will fetch and save the new certificate. For specific instructions on Microsoft Entra, see the Configure SAML v2.0 on Microsoft Entra configuration guide.