Sections in this article:
Introduction
SLA timers can be configured on Vendor Portal workflow phases to:
-
Set deadlines for vendor actions
-
Automatically move cards to the next phase when the timer expires
-
Track and report on workflow performance
-
Highlight delays and bottlenecks
What are SLAs?
SLA stands for Service Level Agreement. In Gatekeeper, SLAs act as countdown timers on workflow phases. The timer starts as soon as a card enters a new phase, helping to track how long it's been active and manage deadlines effectively.
To learn more, see Workflow SLA Timers.
Configuration
Set an SLA
- Click on the Vendor Portal phase of your workflow to edit it.
- From the SLA section, enter a value, then select the unit (hours or days) from the dropdown list.

Once set, any cards on that phase will start counting down from the point they arrive there.
Use SLAs in Notification Emails
In workflow notification or reminder emails, you can dynamically include the card’s SLA due date to inform vendor users of the deadline. To do this, insert the following into the email template:{{ enter_phase.sla_due_date }}
Note: If the SLA deadline is used to automatically transition the card to another phase, it’s recommended to mention this in the email notification. This helps to:
-
Ensure the vendor understands the deadline is enforced
-
Prevent confusion if the form becomes inaccessible after the deadline passes
For example, the following content could be used in an email template:
{{ recipient.full_name }},
You are invited to complete an onboarding form for <strong>GATEKEEPER</strong> on behalf of {{ card.name }}
This is a key part of our process to ensure that the setup and management of our supply chain/contractual obligations runs smoothly! ✅
If you have any queries about the process, you can reach out to <strong>[xyz team/person]</strong> via email or by <i>@-tagging</i> them in the onboarding form <strong>Messages</strong> tab
Many Thanks,
GATEKEEPER Procurement Team
<hr><i>You will receive an automated reminder every <strong>3 days</strong> until a submission is received. Please aim to complete this form by <strong>{{ enter_phase.sla_due_date }}</strong> to avoid any delays</i>
This will produce an email like the screenshot below, with the SLA due date added:

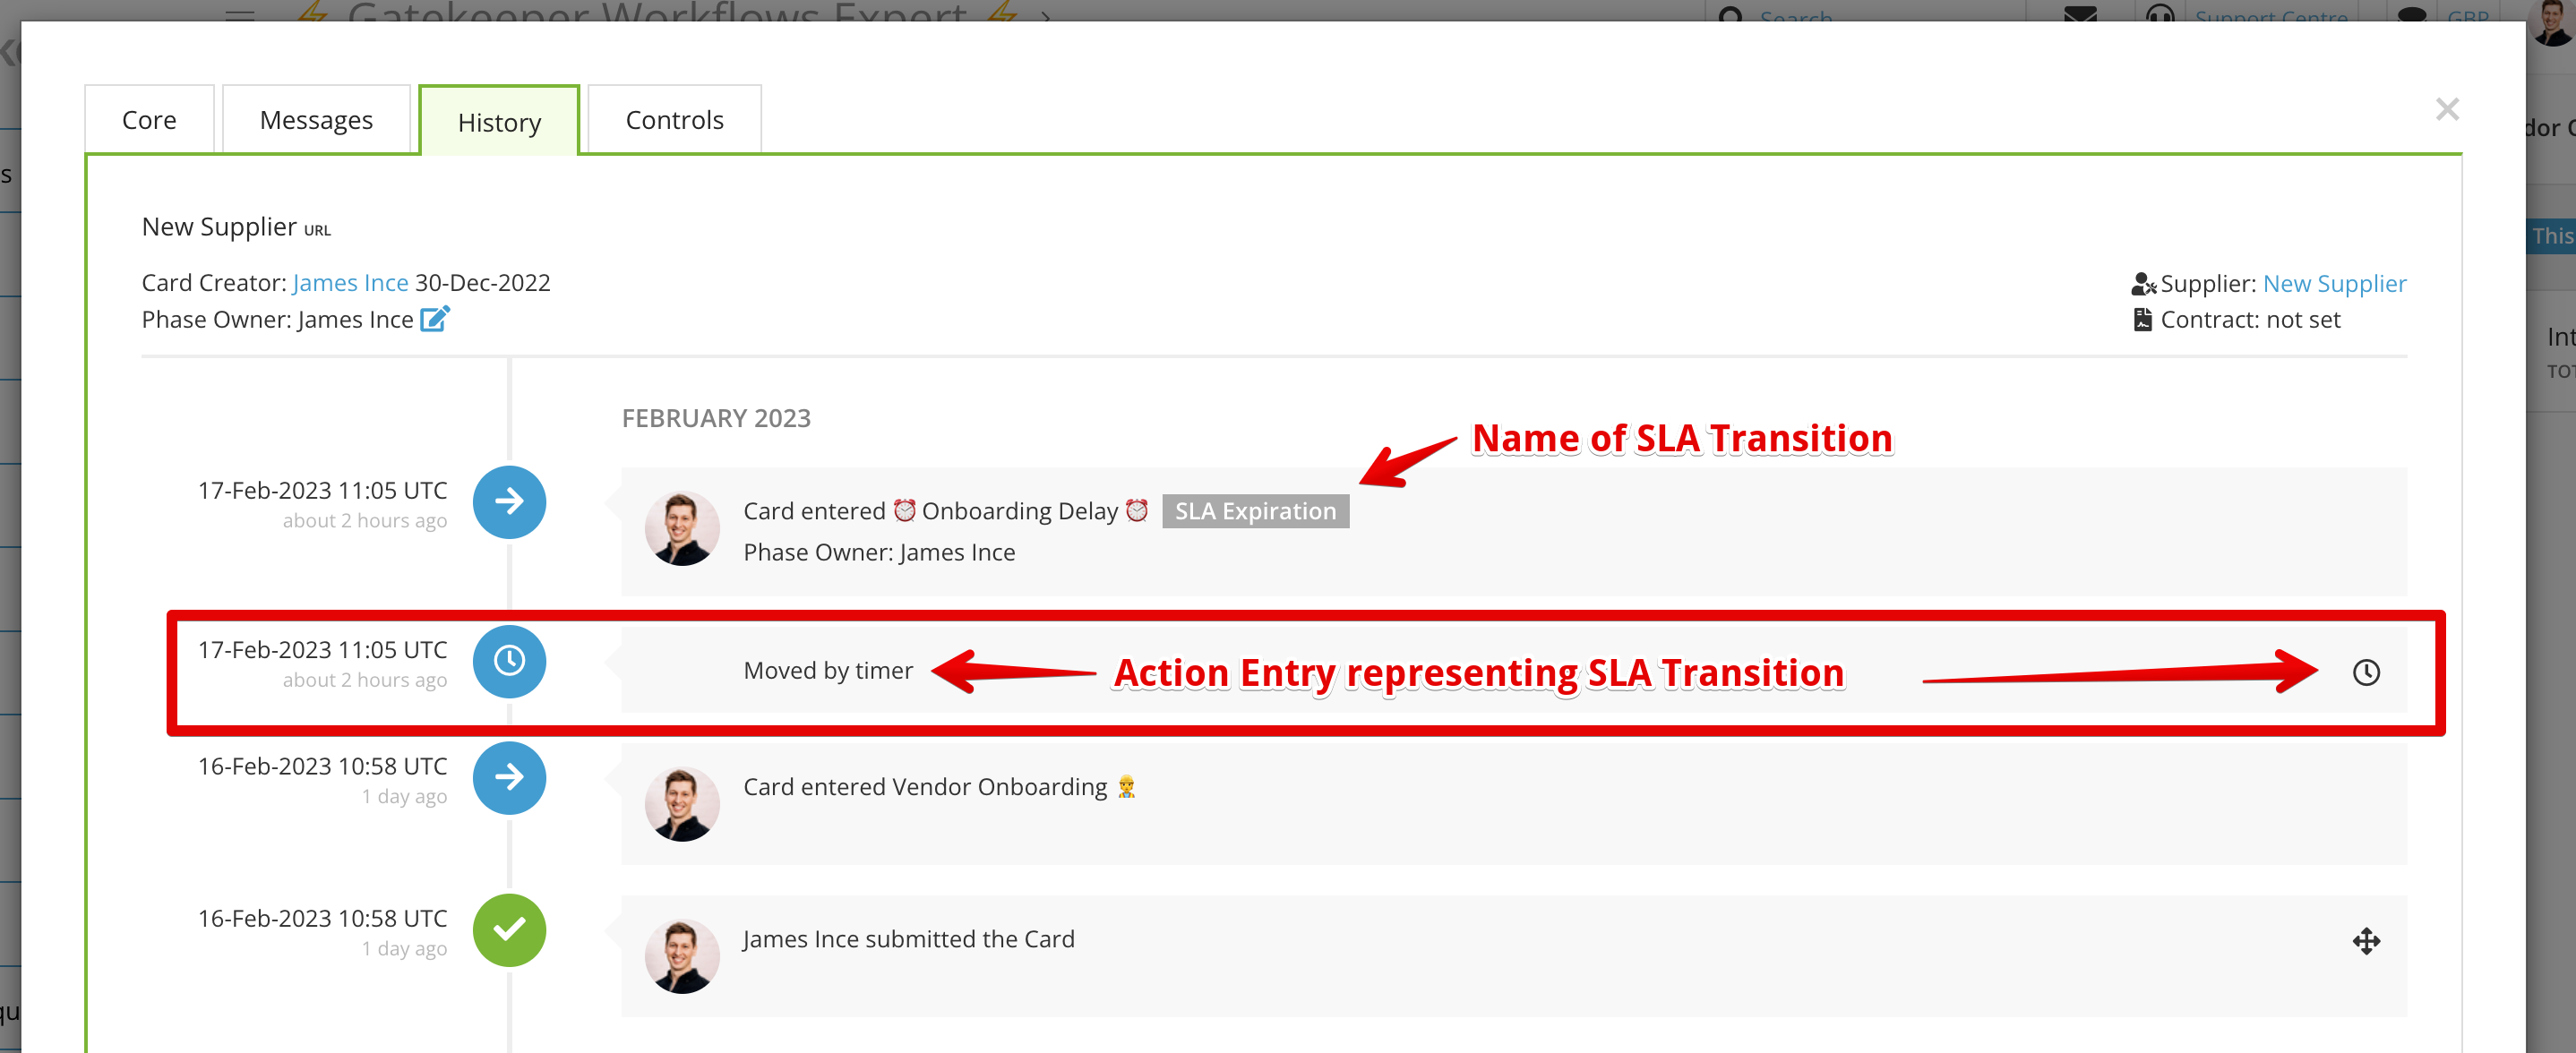
SLA Transitions
You can automatically move a card to another workflow phase when an SLA timer expires. This can be used to keep processes flowing smoothly and prevent bottlenecks through automated actions. To do this:
- Click on the Vendor Portal phase of your workflow to edit it.
- From the Transitions section, select the Conditional radio button.
- Click ➕ADD TRANSITION.
- Enter a name then click Create.
- Set the Transition To Phase, i.e. the phase you want cards to move to after surpassing the deadline.
- Click ➕ADD and configure the condition as follows, then click Create:
- SLA Deadline Expiry + is Expired, or
- SLA Deadline Expiry + is expired by + [number of days]
- Set the Transition Status to Live.

The example above would escalate a late Vendor Onboarding phase back to the Card Creator, who could then decide whether to continue with the onboarding or whether the vendor should be disengaged.
You could also configure this to automatically archive forms that have been abandoned. To do this:
- Add a new Done phase e.g. Onboarding Form Abandoned
- Add a conditional transition with the rule:
SLA Deadline Expiry + is expired by + 90 Days (or another suitable duration)
See Configure Workflow SLAs for more information on using SLAs in transitions.
Monitoring SLAs
There are various ways you can track SLA timers:
- When opening a workflow card, users can see the SLA deadline in a banner at the top.

- When an SLA has been applied to a card, an icon will display on the Kanban view showing the days/hours until the deadline. This will be highlighted in red if the deadline has passed.

- When using the Workflow List view, SLA can be selected as a configurable column.

- In the List view or the Kanban view, you can filter by SLA Expired to show cards which have passed their SLA deadline.

-
The Card Age report gives a visual comparison of average card ages vs the expected SLA deadline (shown as a red line).

- If you have configured an SLA Transition, you can track when one of these transitions has been applied in a card's History tab: