
Sections in this article:
Introduction
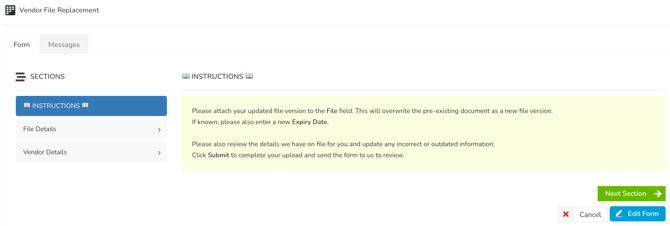
You can add guidance and context directly within a workflow form to help vendor users understand what is required. This is particularly useful for vendors who are new to your organisation’s onboarding process, or to due diligence forms more broadly. The instructions will appear to vendor users when they start the form:
We recommend that these instructions include:
- Actions required by the vendor user (e.g. Click Submit when finished, or Click Save to store your responses and complete the form later)
- Additional context about the inputs (data/documents) required
- Additional resources if they have questions/need more context
- An escalation point/contact
Configure Vendor Portal Form Instructions
Vendor Portal users don’t have access to the full internal view of Gatekeeper, so they won’t see workflow cards in the same way your internal users do. This means any instructions added to the Phase Description won’t be visible to your vendors.
Instead, you can add a new section to the form that contains any introductory guidance or context you want to share. Then, configure this section to display only on the relevant Vendor Portal phase(s). See the demo below or follow the steps to configure this:
Add the Description Section
- Click the Vendor Portal phase of your workflow to edit it.
- Navigate to Form, then click ADD SECTION.
- Enter a name for the section, e.g. Vendor Portal Instructions.
- Enter your guidance in the Description box, using formatting and links where helpful to highlight key information and direct vendors to supporting resources.
- Select the Display Description checkbox, then click Save.
- Click REORDER and drag this new section to the top of the form.
- Click Update.
Configure the Visibility
After adding the instructions section, you need to ensure it is only visible to the intended audience, i.e. vendor users. To do this:
- Click the settings icon to access the Configuration View.

- Hover over the relevant section box and ensure that Read Only is selected for the Vendor Portal phase, and Hidden is selected for all other phases.

Note: You can also embed guidance into specific form fields using Tooltip Text.

FAQ 💬
Q: Can these updates be made if we are already using the workflow?
A: Yes. Any updates you make will instantly be visible to vendor users.
Additional Reading 📚
- Add Help Text to Workflow Forms - See a summary of the basics for adding guidance text to your workflow forms.