
 Estimated Read Time: 8 Minutes
Sections in this article:
Introduction
The Vault brings together your vendors, contracts, categories, projects, teams, and entities. You can use features like configurable columns, filters, and saved views to build tailored views of your data that highlight the most relevant and important information. Watch the video below to learn more about these list views:
You can:
- Display as few or as many data fields as you like
- Change the order of columns
- Set ‘sticky’ persistent views on a per-user basis
- Search and filter on core and custom data fields
- Share saved views with specific users or teams
- Export the view to a CSV file
While this article focuses on the Vault, there are other areas of Gatekeeper that also use these features, such as Files.
Note: You can schedule list views to automatically send data to users by email on a recurring basis. See Send Scheduled Reports for further details.
Navigate the Vault
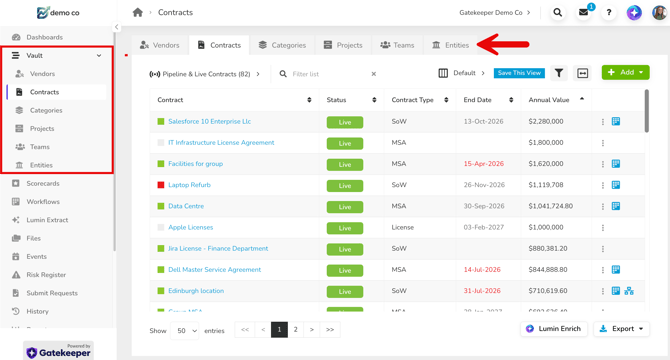
To view vendor, contract, category, project, team, and entity records, click Vault from the navigation menu, then click the relevant tab. Gatekeeper remembers your last open tab even if you log out or navigate away.
Configure Columns
Configurable columns allow you to organise and present your data in a way that maximises its value and relevance. To configure which columns will display:
- Click the Configure Columns icon.

- Expand each data section to view the associated fields, then select the relevant checkboxes to display them in the table. This includes fields from the core data model and custom data fields you have added.
- If you are struggling to find the required data field, use the search box to search across all available columns.
- Click Select All on a section to include all fields within it.
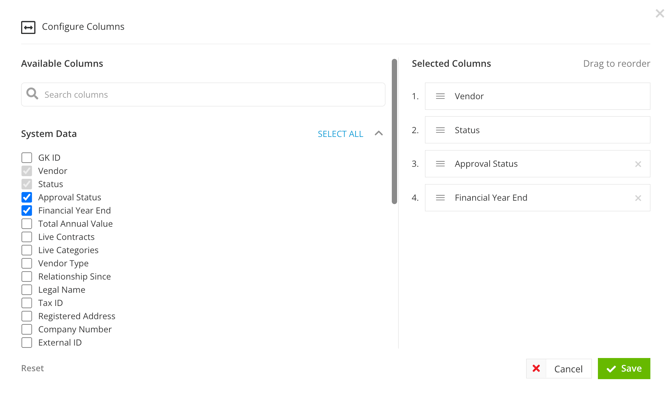
- From the Selected columns area, click and drag the columns into the desired order.
Hover over a column and click Move to top to reorder it into first position. - Once finished, click Save.
Note:
-
You can include vendor data columns in the Contract list view, to show information from a contract record's associated vendor. These columns will be marked with | Vendor.
- Custom tables cannot be added as a column.
Filter Results
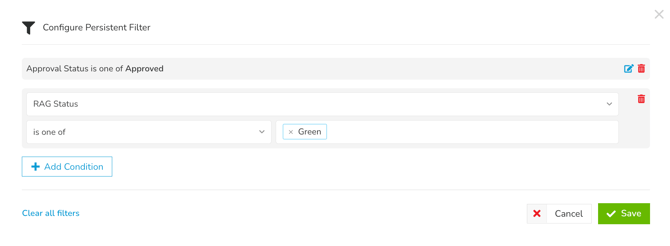
Filters allow you to access and analyse the specific records that are relevant to your needs, for example, you could add a filter to only show contracts owned by you. Once these filters are set, they will be retained as the user logs out and back into Gatekeeper.
To apply filters:
- Click the Filter icon.

- Enter the relevant criteria using the dropdown lists, for example Approval Status is one of Awaiting Approval, Approved.
- If required, click Add Condition to create multiple conditions for your filter. These work on an AND basis, so all conditions must be true for the record to be displayed.
- Once finished, click Save.
Reset Filters to Default
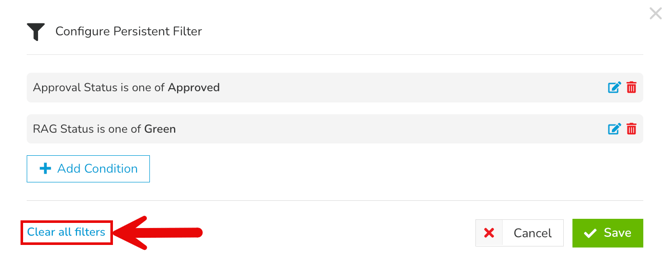
You can remove any filters you currently have applied by clicking the Filter icon, then clicking Clear all filters.
Quick Search
To find a specific record, type the name into the Quick Search, then hit Enter.

This will display a filtered list of all records that match the text.
Save a View
Saved views allow you to preserve your tailored views of data for quick and easy access, eliminating the need to recreate reports every time you need to analyse data.
To save a view:
- Configure your data view with the desired columns and filters.
- Click Save This View. This will only become available when you have made changes from the default view.

- Select Save New View to create a brand new list view, and enter a title.
- Click Submit.
You can then expand the saved views dropdown list to swap between your previously saved views. Your saved views are grouped into My Views (Private), My Views (Shared by Me), and Shared with Me.
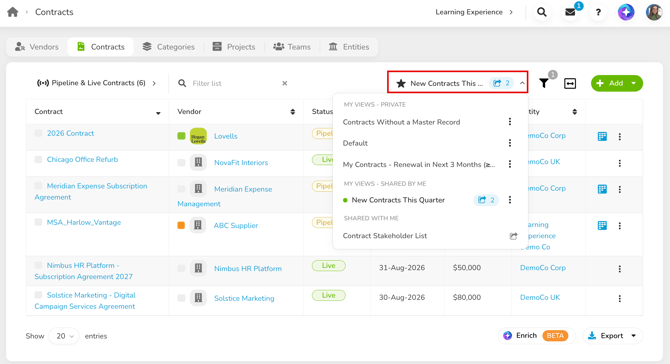
Share a Saved View
Users can share a saved view they have created, granting other users or teams read-only access to it so they don't have to recreate it themselves.
To share a saved view:
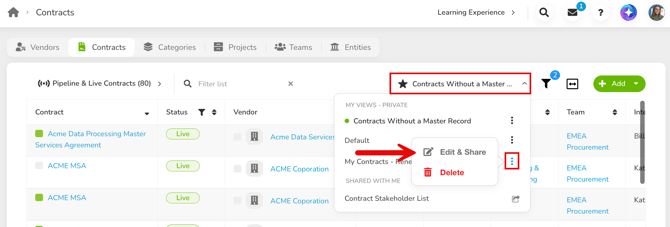
- Expand the saved views dropdown list.
- Expand the 3 dots on the relevant saved view, then click Edit & Share.
- From the dropdown lists, select the users or teams you want to share the saved view with.
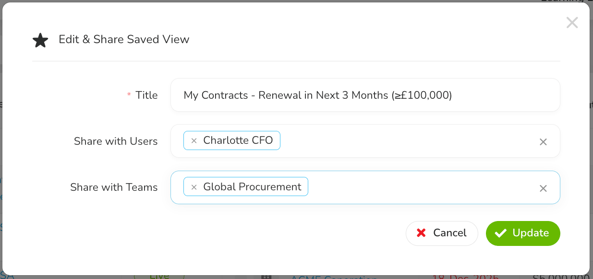
- Click Update.
The recipients receive an email notification with a link to the saved view.
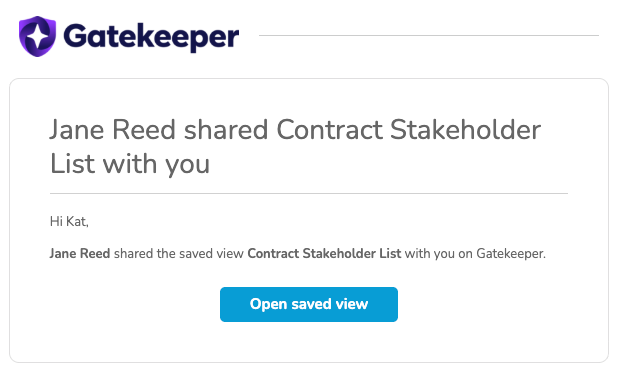
Note: A shared saved view respects each recipient's own permissions. Recipients only see data they already have access to, for example, sensitive data fields are hidden from anyone without the sensitive data permission.
The saved view will appear in their dropdown list under Shared With Me.
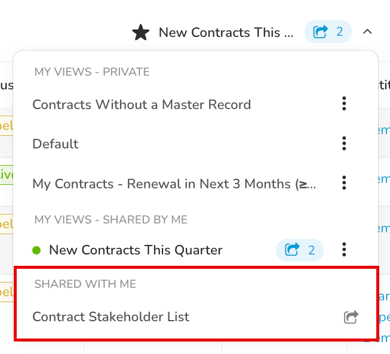
Recipients have read-only access to the saved views shared with them. They can make changes and save their own modified copy, but they cannot overwrite the original shared view or remove themselves from it.
Edit a Saved View
To modify an existing saved view:
-
Open the relevant saved view from the dropdown list.
-
Update the columns and filters as required, then click Save This View.
- Select the Select View to Update radio button, then select the title of the existing view from the dropdown list.
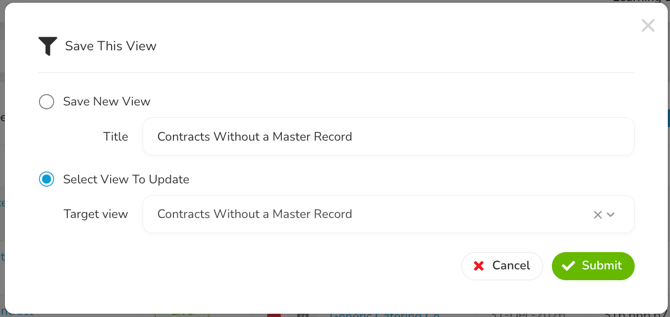
- Click Submit.
Note: If you edit a saved view that's shared with others, your changes automatically apply for every recipient. You'll see a confirmation message before your changes are saved.
Delete a Saved View
To delete a saved view:
- Expand the saved views dropdown list.
- Expand the 3 dots on the relevant saved view, then click Delete.
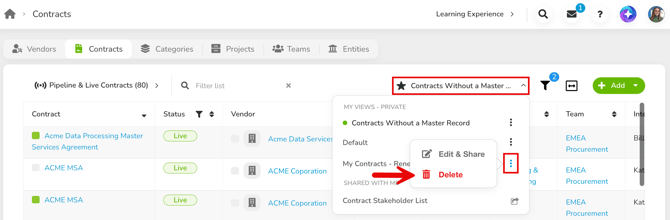
- Click OK to confirm.
- This will permanently delete the saved view, and cannot be undone.
- Deleting a saved view that's shared with others also removes it for every recipient.
FAQs