
![]() Estimated Read Time: 7 minutes
Estimated Read Time: 7 minutes
Sections in this article:
- Add eSign Users
- Initiate eSign
- Manage Document Signatories
- Place Floating eSign Fields
- eSign the Document
Gatekeeper's eSign saves time, money, and hassle by allowing you to sign and send unlimited documents electronically from anywhere, at any time. This article covers the process of using eSign, from setting up senders and signatories to sending agreements for execution. If you are looking to use a workflow to send PDFs for eSign, see Initiating eSign from a Workflow.
For further information on the legality of electronic signatures, including EIDAS compliance, see The legalities of Electronic Signature. In summary:- Gatekeeper eSign qualifies as an AES (Advanced Electronic Signature).
- For QES (Qualified Electronic Signatures), Gatekeeper has a native DocuSign Integration.
Demonstration Video
To learn about both the sender and signatory experience during the eSign process, watch the video below:
Configure eSign
Note: To follow these steps, users must be Global Administrators with the Configuration additional permission. For further information see User Management Definitions.
Before using eSign, the feature must be enabled on your Gatekeeper tenant. To do this:
- From the navigation menu, expand the Settings option, then click Configuration.
- Click eSign.
- Enable the eSign Module Configuration toggle.

- Enable the additional toggles if required to show the document history and location details.
- Select the entity used as the default for files sent for eSign.
Changes are saved automatically.
Configure Unapproved Vendor Warnings
Gatekeeper can help enforce vendor approval by triggering a warning when an unapproved vendor is involved in an eSign process. When switched on, and an attempt is made to eSign a document that has an unapproved vendor, the following warning will be displayed:
-png.png?width=670&height=289&name=Monosnap%20Licences%20_%20Gatekeeper%20-%20Google%20Chrome%20202%20(2)-png.png) Administrators can configure this, and exempt specific contract types from triggering the warning, for example, excluding all Non-disclosure Agreements from receiving the warning. To manage this:
Administrators can configure this, and exempt specific contract types from triggering the warning, for example, excluding all Non-disclosure Agreements from receiving the warning. To manage this:
- From the eSign Module Configuration page, enable or disable the Unapproved Vendor Warning toggle as required.

- To manage excluded contract types, select the relevant contract types from the Excluded Contract Types dropdown list.

Note: Once a contract type is added to the excluded list, it cannot be deleted from the contract type dropdown list configuration. Remove it from the excluded list first if you need to delete it.
When an eSign with an unapproved vendor is overridden, an entry in the audit trail is created to reflect this decision.

Add eSign Users
Before sending and signing documents, you first need to set up Authorised Senders and Signatories:
- eSign Senders are internal users who can initiate the eSign process, and select the internal and external signatories.
- eSign Signatories are internal users who are authorised to sign documents.
To configure these users from the eSign configuration page:
- Click Add, then select eSign Sender or eSign Signatory as required.
- Select the user from the dropdown list.
- Click Save.
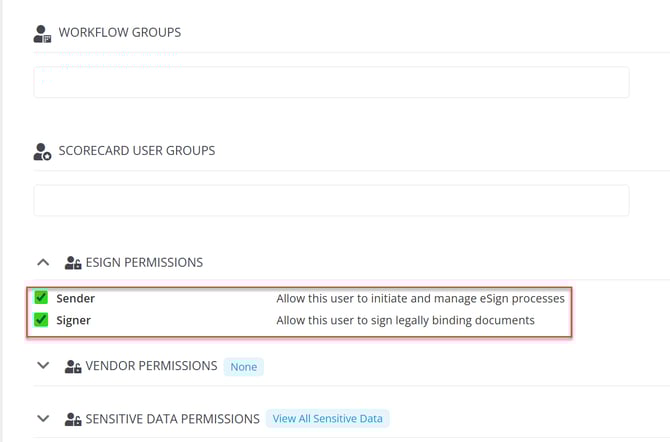
Additionally, eSign permissions can be set from a user's record. To do this:
- From the navigation menu, expand the Settings option, then click Users.
- Expand the 3 dots on the relevant user, then select Edit.
- From the eSign Permissions area, select the checkbox for Sender and/or Signatory.
- Click Save.
Initiate eSign
Note:
- Only PDF files can be eSigned.
- Files that are uploaded within a custom data group marked as sensitive cannot be eSigned.
To start the eSign process on a file:
- From the navigation menu, expand the Vault then click Contracts or Vendors, depending on where the file is stored.
- Open the record that contains the file, then click the Files tab.
- If you have not uploaded the file, first add the PDF version of your agreement. See Add and Manage Files for full guidance.
- Click Start eSign on the relevant file.

- Click Next to initiate the eSign process.
Note: If the file is linked to a vendor who has not yet been approved in Gatekeeper, a warning message may appear before you can continue. You can click Go Back to review the vendor record before continuing, or Override and Proceed to continue with eSign.
Manage Document Signatories
You can now review your agreement, or click Scroll to Prepare eSign to move straight to selecting signatories.

Add Document Signatories
- Select an authorised internal user, and if required, the external vendor user from the dropdown lists.

- If you need to collect more than two signatures, click Add More Signers at the bottom of the page.

Remove Additional Signatories
To remove additional signers, click on the delete icon in the corner of the box. This will not remove them as authorised signatories, but only remove them from signing this specific agreement.

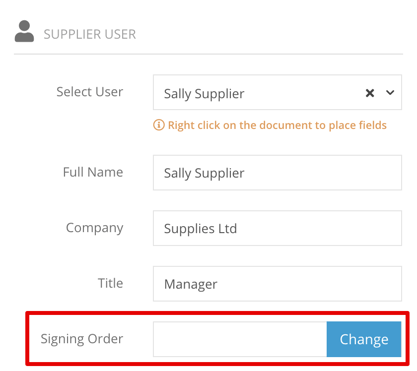
Change Signing Order
The signing order can be amended to meet your individual needs:
- Click Change.
- Drag and drop signers in the correct order. The signer at the top of the list signs first.
- Click Save.
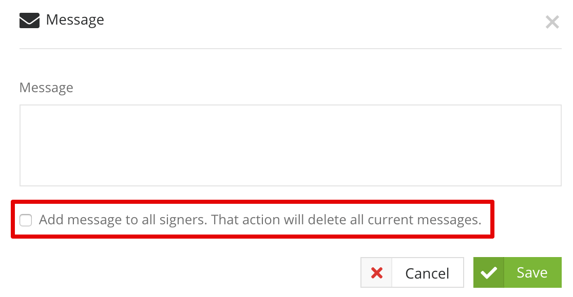
Add a Message
Click Add to enter customised message entries for each signer, as required:

These can be applied across all signers by selecting the Add message to all signers checkbox. This will replace any messages already in place. When you are happy with your message, click Save.
Place Floating eSign Fields
After all signatory fields have been completed, you can add floating fields to determine where the signature and the signer's details will be placed on the contract.
- Right-click (or control-click on a Mac) within the document to place floating signature fields. Field options include:
- eSignature
- Name
- Company
- Date
- Drag and drop the associated fields to the required areas. The fields are colour coded for clarity.

- Once all the relevant floating fields have been placed on the document, click Request Signature.

Both the internal and external signatories will receive emails in the designated order asking them to sign the document, along with a daily reminder email for any outstanding requests.
eSign the Document
- The internal signatory can access the file directly from the notification email, or click eSign this Document in Gatekeeper to complete the eSign process if they are the Sender.

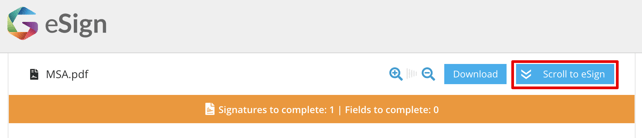
- The signatory can then sign the document by clicking Scroll to eSign.
- The Signatory can then
- click CLICK TO SIGN directly within the document
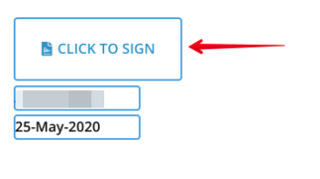
- click SIGN HERE at the bottom of the page

- click Decline if needed.
- click CLICK TO SIGN directly within the document
- Signatories can eSign using four different methods.
- Draw it in: Drawing their signature using a mouse or touchscreen
- Type it in: Typing in their name and selecting a font style
- Upload Image: Upload an image of their signature
- Saved: Returning signatories will be able to access saved signatures
- Once the signature is complete, click Save.
- Click on the signature to be used, then click Insert Everywhere.

- Click I Agree to complete the eSign process.

Other signatories who have not signed the document will be sent an email notification in the designated order. External signatories will follow the same process as outlined above.
Once both parties have completed the eSign process, both parties will receive confirmation emails with an attachment to download a copy of the signed document.

Note:
- If you require signatures in different coloured ink, this must be done either outside of Gatekeeper, or you can upload an image of your signature.
- Once a file is in an eSign process, it is locked and cannot be altered or replaced with a new version, either manually in the Vault or via a workflow action.