
![]() Estimated Read Time: 8 minutes
Estimated Read Time: 8 minutes
![]() Estimated Configuration Time: 30 Minutes
Estimated Configuration Time: 30 Minutes
➕ Requires the Vendor Portal
⚠️ ESG Due Diligence (Smart Form) workflow requires 169 Custom Fields
Sections in this article:
- Introduction
- Mandatory Configuration
- Additional Configuration
- Additional Setup Outside the Workflow
- ⚡️Getting Started - Activate the Triggers⚡️
- ESG Due Diligence (Smart Form)
- Additional Reading
Introduction
This workflow helps you measure and understand your vendor's environmental impact, using an assessment form consisting of the four key ESG topics:
- Sustainability
- Environmental Impact
- Social Impact
- Internal Governance
This offers an automated and streamlined process for assessing vendors alongside any pre-existing onboarding and due diligence activities, delivering quantifiable insights without delaying new relationships. This workflow also goes beyond an initial assessment; the steps below show how to configure it for ongoing vendor re-assessments, for example quarterly, bi-annually, or annually.
The importance of being an advocate for ESG was highlighted by Hannah McDonald, Supplier Operations Lead at Monzo, in an episode of the Procurement Reimagined podcast,
See the video below for a walkthrough demonstration:
Workflow Diagram
Mandatory Configuration
The steps in this section outline the essential setup required to make your workflow fully functional. By completing the configuration steps below, you’ll have a fully operational ESG assessment workflow.
The ⬇️ Additional Configuration ⬇️ section covers optional additions to expand the scope of your process or tailor the workflow to better align with your organisation’s unique policies, procedures, and Gatekeeper subscription features.
Add the Template
To get started, you'll need to add the template workflow:
- From the navigation menu, click Workflows.
- Click Add, then select Workflow Template.
- Click Create on the 🌳 ESG Due Diligence🌳 template.
- Amend the title if needed, then click Create.
Configure the ESG Status Field
Creating a custom ESG Status field is required to enable vendor records to be automatically pulled onto the ESG workflow. The field should include the following statuses:
- ESG Assessment Required ⚠️
- ESG Assessment Complete ✅
- N/A
To configure this:
- From the navigation menu, expand the Settings option, then click Configuration.
- Click Custom Data.
- Click an existing Vendor Custom Data Group or add a new one to store this field in. If you're planning to run more contract and vendor management processes in parallel, consider adding a custom data group named Legal & Compliance to store all related statuses.
- Within the custom group, click➕ Add New Custom Field.
- Enter a label for the field, e.g. ESG Status, and select Dropdown list as the type.
- Add the following dropdown options then click Save.
- ESG Assessment Required ⚠️
- ESG Assessment Complete ✅
- N/A

Configure the Trigger
After creating the custom ESG Status field, you need to configure the trigger using this as a condition:
- From the navigation menu, click Workflows.
- Expand the 3 dots on the relevant workflow, then select Workflow Triggers.
- Click the New ESG Form Required trigger.
- Click ➕ ADD to assign the field you created as the trigger condition, as below:
ESG Status ➡️ is one of ➡️ ESG Assessment Required ⚠️
Add the ESG Status to the Workflow
You'll need to add the ESG Status field to the workflow form, so that it can be updated automatically once a vendor completes the process.
- Click the start phase of the workflow to edit it.
- Navigate to Form, then click ADD SECTION and enter a section name.
- Select the following from the dropdown lists:
- Predefined: Vendor
- Custom Data Group: The custom group that contains the ESG Status field.
- Click Save.
You should then hide this field on the workflow form, so that users cannot update it manually. To do this:
- Click the cog icon to access the workflow configuration.

- Locate the form section that contains the ESG Status field.
- Select Hidden from the dropdown list on the start phase, then click the copy icon.

- Select the checkboxes for all other phases in the workflow. This will apply the settings for this section from the start phase to all other phases.

- Click Copy to save the changes.
Once you have added the ESG Status field to the workflow, you'll need to configure the AutoAction settings so that a vendor's status is updated when the workflow is complete:
- Click the ESG Review Completed ☑️ phase to edit it.
- From Actions, click Edit AutoAction Values alongside ⚙️ AutoAction | Update Vendor.
- Select ESG Assessment Complete ✅ from the ESG Status dropdown.
- Click Save.
Additional Configuration
This section covers optional steps to adjust the workflow’s scope or default settings, helping you tailor it to your organisation’s needs.
Configure Recurring ESG Reviews ♻️
If your organisation requires recurring ESG checks, you can configure the workflow to repeat this process at scheduled intervals, for example annually. See the video below to learn more:
Part 1 - Add a custom ESG Date field
First, you'll need to add a custom date field that will be used to automatically pull vendors onto the workflow at the right time.
- From the navigation menu, expand the Settings option, then click Configuration.
- Click Custom Data.
- Click an existing Vendor Custom Data Group or add a new one to store this field in.
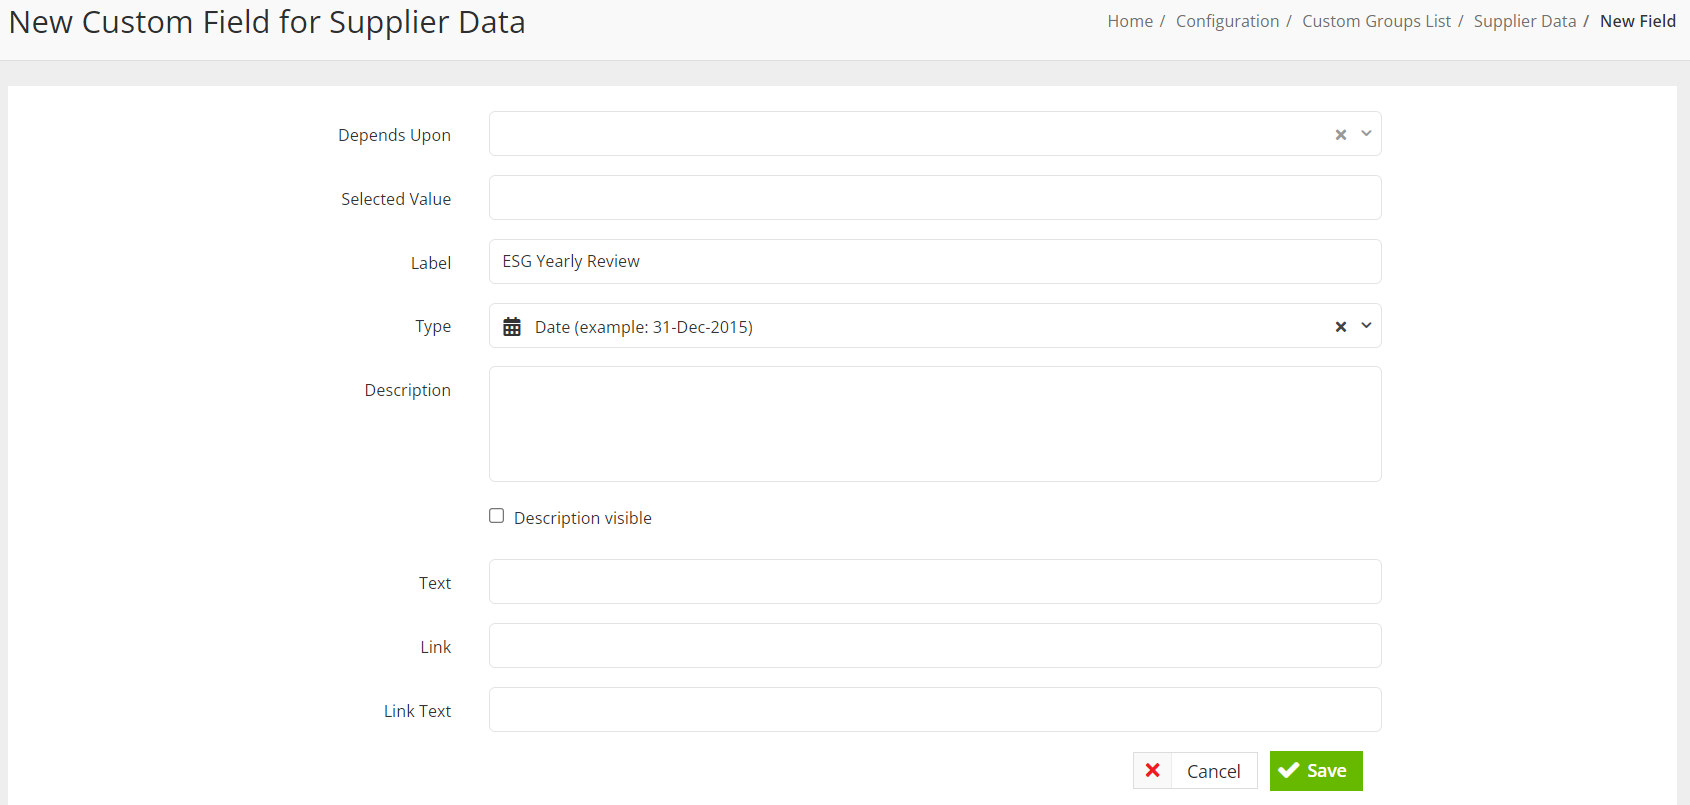
- Within the custom group, click➕ Add New Custom Field.
- Enter a label the field, e.g. ESG Yearly Review, and select Date as the type.
- Click Save.
Part 2 - Add the Date field to the form
You'll need to add the ESG Date field to the workflow form, so that it can be populated automatically as part of the workflow.
- Click the start phase of the ESG Due Diligence workflow to edit it.
- Navigate to Form, then click ADD SECTION and enter a section name.
- Select the following from the dropdown lists:
- Predefined: Vendor
- Custom Data Group: The custom group that contains the ESG Date field.
- Click Save.
Part 3 - Set the Date via ⚙️AutoActions
Once you have added the ESG Date field to the workflow, you'll need to configure the AutoAction settings so that the field is populated on the vendor's record when the workflow is complete:
- Click the ESG Review Completed ☑️ phase to edit it.
- From Actions, click Edit AutoAction Values alongside ⚙️ AutoAction | Update Vendor.
- From the ESG Date field, select the relevant period of time e.g. 12 Months after Today.
- Click Save.
Part 4 - Create a Trigger
Finally, you'll need to create a trigger to pull vendors onto the workflow automatically when their ESG review date is approaching.
- From the navigation menu, click Workflows.
- Expand the 3 dots on the relevant workflow, then select Workflow Triggers.
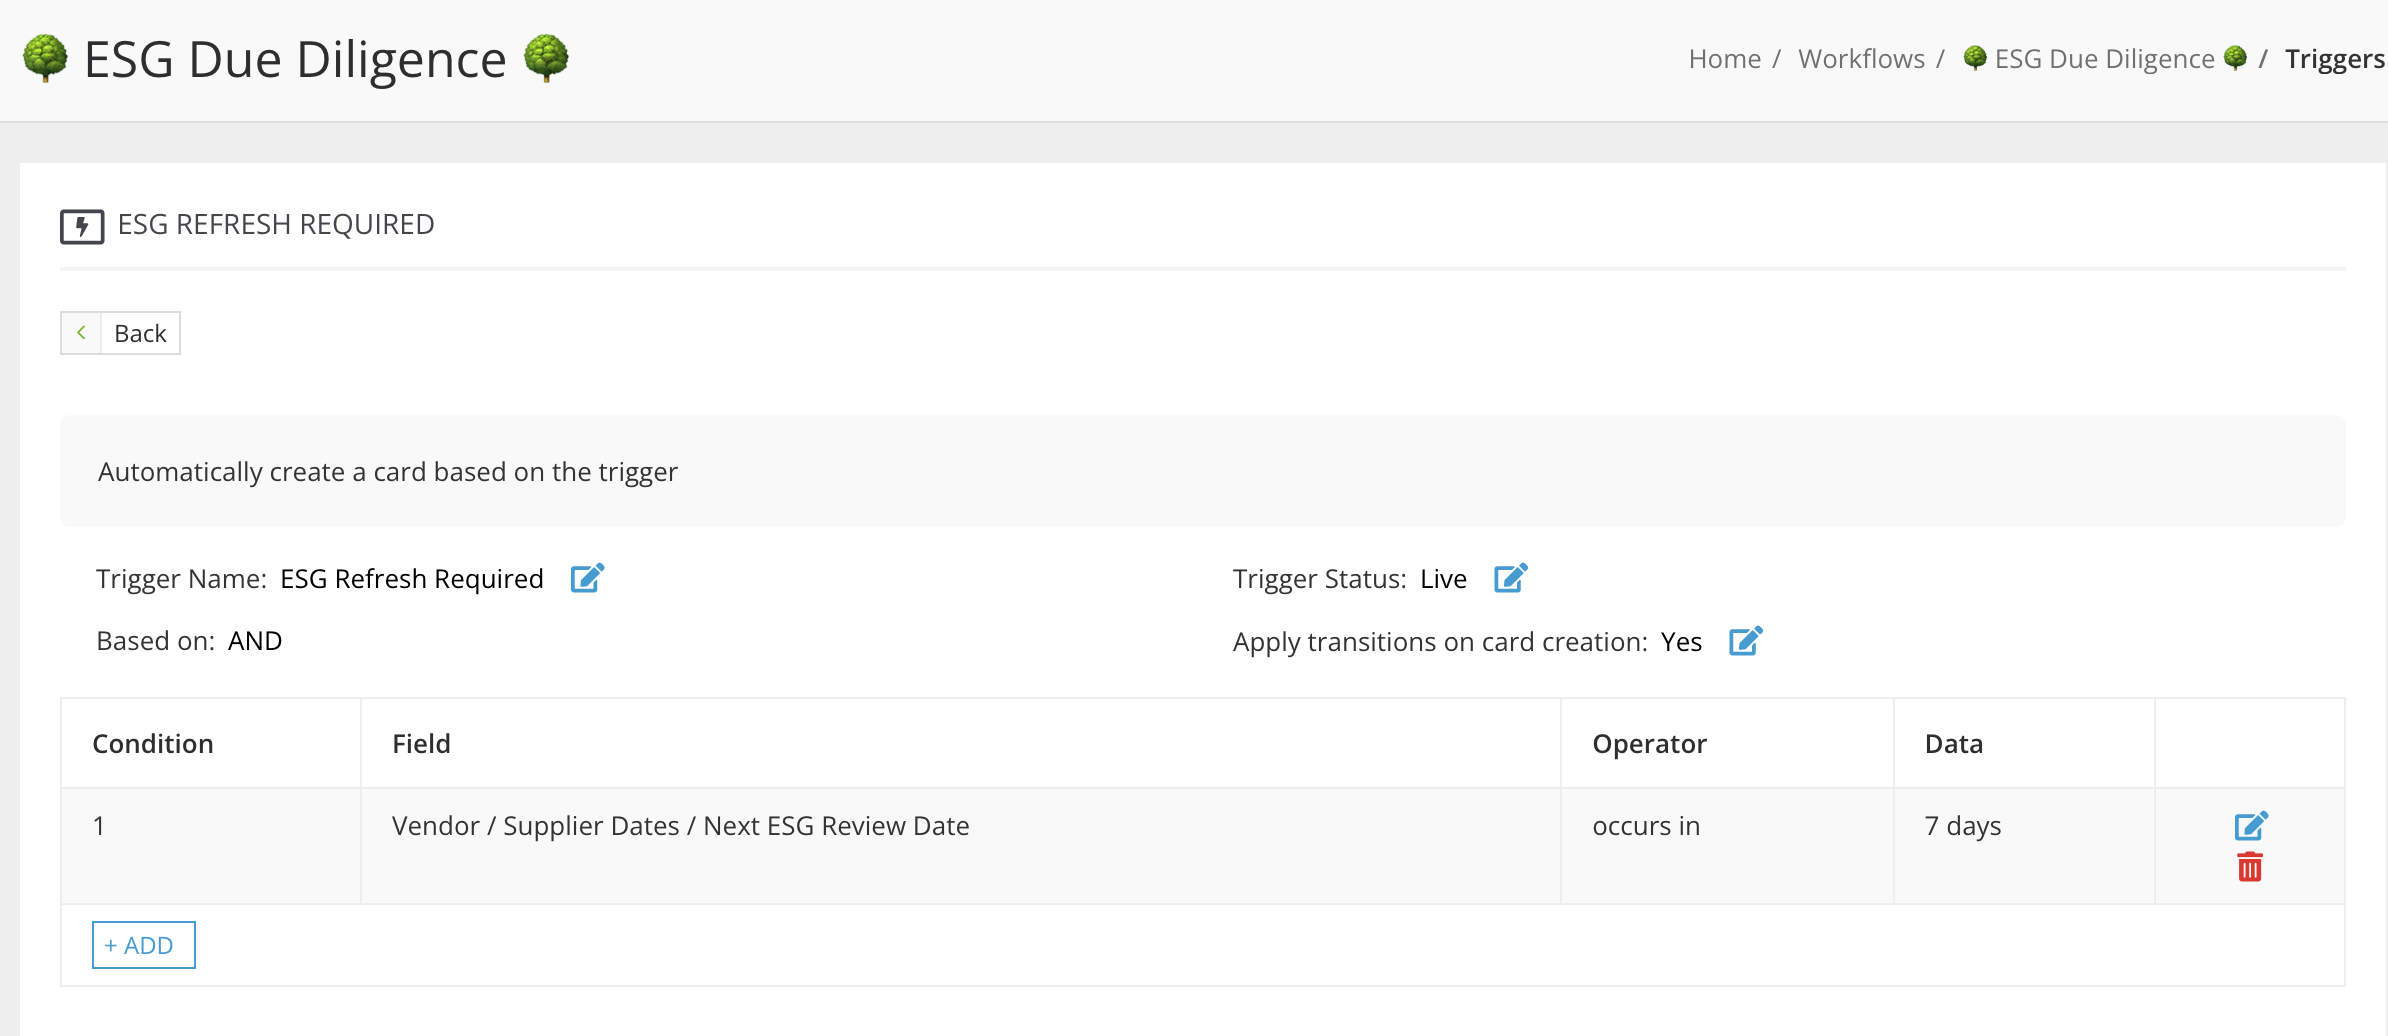
- Click➕Add Trigger, then enter a name (e.g., Yearly Review) and click Create.
- Under Conditions, click ➕Add then locate the newly created custom date field.
- Configure the condition, for example Next ESG Review occurs in 7 Days, then click Create.
- Click the pencil icon to set the Trigger Status to Live.
Convert the ESG Form to Custom Data 💾
By default, data from the ESG questionnaire is only stored only in the vendor's workflow card. However, if you want ESG data to appear directly on the vendor record, and be reportable from the vendor repository, you'll need to recreate the form fields as custom data.
Before doing this, it's important to understand the pros and cons of this approach as it requires substantial manual configuration:
Pros
- ESG data will be available in the vendor repository, allowing you to assess your full vendor base and create reports.
- Previous responses will be auto-filled for vendors completing a subsequent review, reducing effort
- The Update Vendor action highlights changes, making internal reviews faster
Cons
- Adds a substantial number of custom fields, which could affect your plan quota or clutter the repository
- Initial setup takes time - but it's a one-off task
- Pre-filled responses may lead vendors to submit without careful review
The process for doing this is as follows:
- Transcribe all form fields to custom data fields.
- Go to the Custom Data configuration page.
- Create a new custom data group relating to each form section within the workflow. Recreate the fields and field settings from the form to your new custom fields.
- Add new custom data form sections to the workflow.
- Head back to the ESG workflow.
- Edit the start phase and from Form, use Add Section to add in each of the newly transcribed custom data groups.
- Remove the old form only data sections. These will be the sections that do not have Cloned From next to them.
-
If these fields do not contain any data (i.e. you have not used the workflow yet), click the
 delete icon to remove them.
 -
If they do contain data, it's recommended to Hide them in each phase of the form instead.
-
-
Select the Take value from form checkbox for the new fields in each of your AutoActions.
-
Create a new Custom Tab for the ESG data and move all the groups to this tab.
Note: To make the fields easier to read in reports and summary views, it's recommended to use shorter labels for the ESG metadata fields:
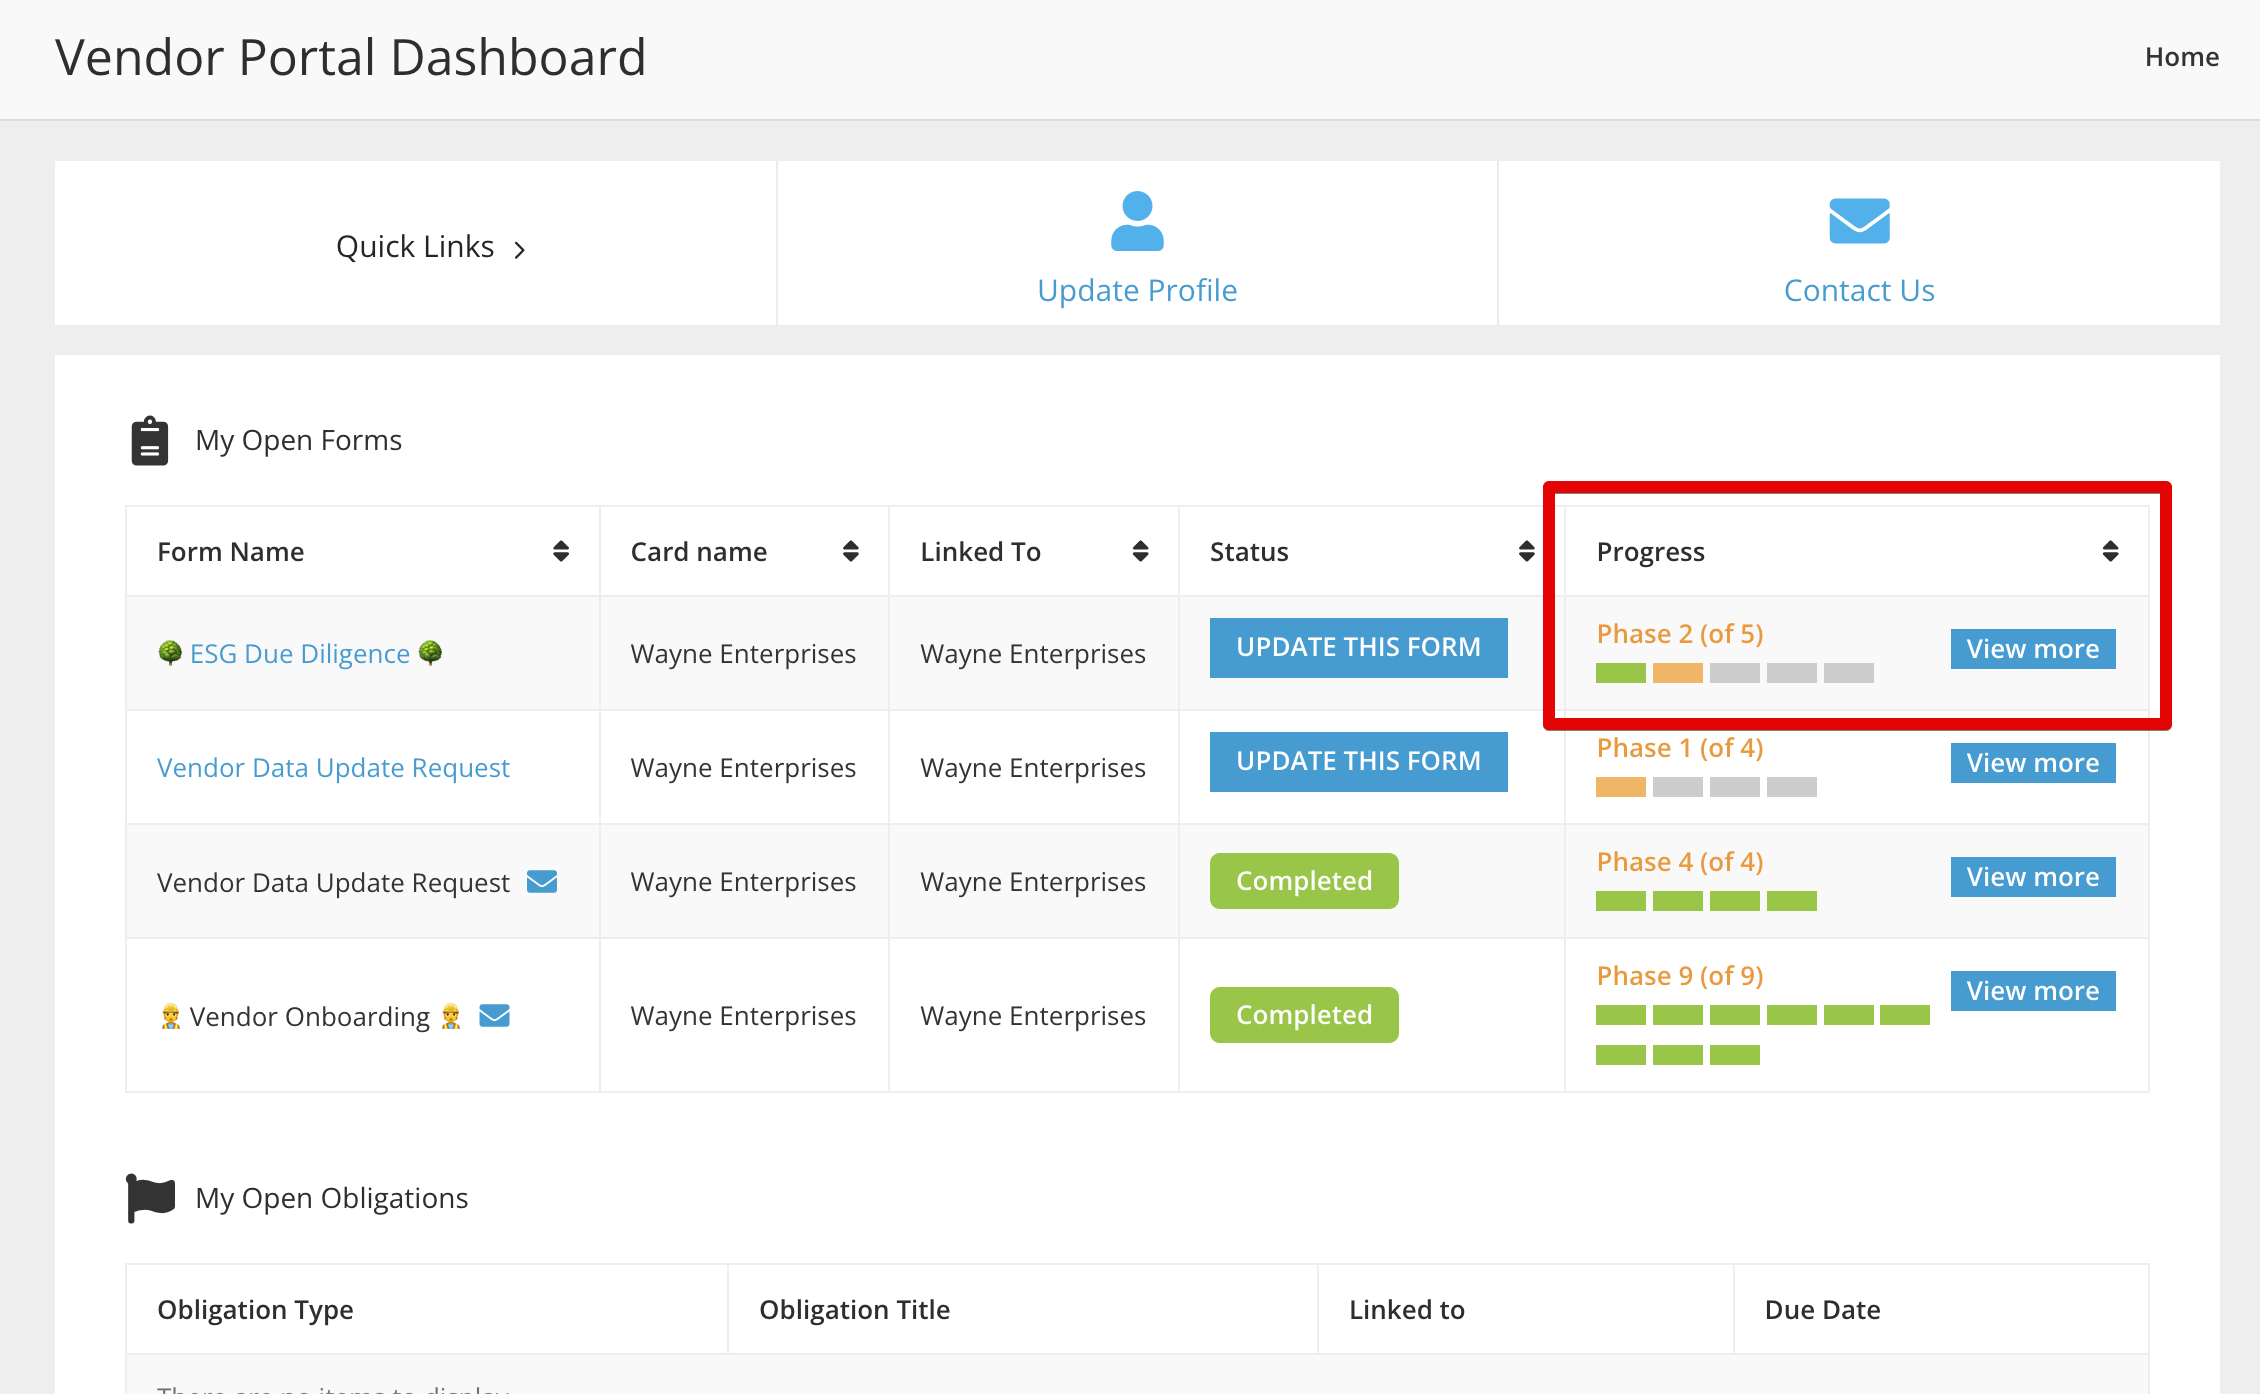
Hide Phases from Vendor Users
You can hide certain phases to simplify the Progress tracker view for Vendor Portal users. This is useful for phases that are not relevant to them, for example AutoAction phases:
To configure this:
- From the navigation menu, expand Modules then click Vendor Portal.
- In the Vendor Portal Workflows section, expand the 3 dots on the ESG workflow and click Edit.
- Select the Hide checkbox for the phases you wish to hide, e.g. AutoStart ⬆️ and Form Abandoned 🗄.
- Click Submit to save your changes.
Additional Setup Outside the Workflow
If you’ve followed all of the steps above, your workflow is nearly ready to launch. However, to help the process run as smoothly and reliably as possible, there are a few additional areas of your Gatekeeper tenant worth reviewing.
Add the Custom Status Field to Other Workflows
When running the ESG workflow alongside other vendor assessment processes, such as onboarding, it's recommended to set it to trigger automatically when a new vendor is added. This allows multiple onboarding actions to run in parallel, helping you onboard vendors faster. To learn about configuring this, see Parallel Workflows.
Add Vendor Users
Before vendors can complete the ESG questionnaire on the Vendor Portal, ensure that the relevant contacts have been added as vendor users:
- From the navigation menu, click Vault > Vendors.
- Click on the relevant vendor record to open it.
- Click the Vendor Users tab to view existing contact details.
- Click Add, then select Vendor User to add a new contact.
⚡️Getting Started - Activate the Triggers⚡️
Once your workflow is fully configured, activate the triggers to make it live:
- From the navigation menu, click Workflows.
- Expand the 3 dots on the relevant workflow, then select Workflow Triggers.
- For any trigger with a Pipeline status, click on the trigger's name.
- Click the
 pencil icon on Trigger Status.
 - Select Live from the dropdown list, then click Update.
- Click < Back to return to the list of triggers.
- Repeat steps 3-5 until all triggers are live.
ESG Due Diligence (Smart Form)
The ESG Due Diligence (Smart Form) is a best practice workflow that builds upon the standard ESG workflow using the power of Gatekeeper's Smart Forms functionality. It's pre-configured with minimal setup required, and includes pre-defined weighting for balanced scoring. This provides a structured process for data collection, review, and scoring.
The setup steps are the same as those for the standard ESG best practice workflow - except for the form. Instead of creating your own custom data and questions, Gatekeeper will automatically generate ESG-specific fields, questions, and scored weightings. The four assessed areas, Sustainability Governance, Environment, Social, Governance, are weighted at 25% each.

Note: Adding the ESG Due Diligence (Smart Form) workflow template will automatically create 169 custom fields. If you decide not to use the workflow after adding it, these fields will need to be removed manually, so ensure this setup suits your needs before proceeding.
Each question must be answered with either a Yes (scored at 100%) or No (scored at 0%).

For certain questions, if the respondent selects Yes, this will trigger a follow-up question with a multi-line text field for providing additional detail.

Additional Reading 📚
- Custom Tabs - Learn how to segment your ESG data into a separate tab on the vendor record, if you plan on converting the ESG Form to Custom Data.
- ⚡️ Parallel Workflow 2 - Vendor Onboarding ⓧ Automated NDAs - See a walkthrough to a similar use case to this workflow (i.e. a workflow process which automatically initiates in parallel with a vendor onboarding workflow).
- ⚡️ Gatekeeper Expert - Use AutoActions to Populate and Trigger Dates ⚡️ - Learn about using a custom date field to automate refresher assessments.
- 🛠️ Create Your Own - Vendor Onboarding Workflow - If you don't have a workflow for onboarding new vendors, follow this guide to configure our best practice template.