
![]() Estimated Read Time: 7 minutes
Estimated Read Time: 7 minutes
Sections in this article:
- Initiate eSign from a Workflow
- Manage Ongoing eSign Processes
- eSign the Document
- Multiple eSign Processes
- Configuration
- eSign Handlebars
- FAQs
Note: eSign must be enabled and configured in Gatekeeper before initiating the eSign process. See Configure and Send Files for eSign for detailed steps.
Initiate eSign from a Workflow
When a card has transitioned to a workflow phase configured for eSign, an email will be sent to the phase owner to initiate the process. To send a file for eSign from the workflow:
- Navigate to the workflow card and click Start New eSign Process.

- If you have both Gatekeeper eSign and DocuSign enabled at the same phase, you can select which method you wish to use before preparing the document/envelope.
-
Select the file and host (i.e. the contract or the vendor it will be associated with). Files already uploaded in the workflow form, and the master record associated with the contract will appear in this list.

- If the contract record does not have a master record, select the Set as the Master Record checkbox for the relevant file.
- Click Save & Next to continue.
- If the file is linked to a vendor who has not yet been approved in Gatekeeper, a warning message will appear before you can continue. Click Go Back to review the vendor record before continuing, or click Override and Proceed to continue with eSign.
Manage Document Signatories
You can now review the document, or click Scroll to Prepare eSign to move straight to selecting signatories.
- Select an authorised internal user, and if required, the external vendor user from the dropdown lists.

- If you need to collect more than two signatures, click Add More Signers at the bottom of the page.

- To remove additional signers, click the delete icon in the corner of the box. This does not remove the users as authorised signatories, it only removes them from signing this agreement.

- To remove additional signers, click the delete icon in the corner of the box. This does not remove the users as authorised signatories, it only removes them from signing this agreement.
- To amend the signing order, click Change.

- Drag and drop signers in the correct order, then click Save.
- Click Add to enter customised message entries for each signer, as required.

- To apply this message to all signers, select the Add message to all signers checkbox.
- Enter the message, then click Save.
Place Floating eSign Fields
After all signatory fields have been completed, you can add floating fields to determine where the signature and the signer's details will be placed on the contract. This includes:
- eSignature
- Name
- Company
- Date
To do this:
- Right-click (or control-click on a Mac) within the document to place floating signature fields.
- Drag and drop the associated fields to the required areas. The fields are colour-coded for clarity.

- Once all the relevant floating fields have been placed on the document, click Request Signature.

Both the internal and external signatories will receive emails in the designated order asking them to sign the document.
Note:
-
Gatekeeper tracks the eSign process and adds a full audit trail to the end of each document that goes through this process, regardless of floating field use.
- Once a file is in an eSign process, it is locked and cannot be altered or replaced with a new version, either manually in the Vault or via a workflow action.
Manage Ongoing eSign Processes
You can make changes to an eSign process after it has been initiated.
Resend eSign Notifications
After eSign has been initiated, email notifications can be resent to prompt completion:
- Click the associated workflow card, then click Resend Email.

- Click Resend Email on the relevant signatory, then click OK to confirm. The option to resend will depend on the specified signing order.
Change the Signatories
You can update the specified signatories after the eSign process has been initiated.
- Open the relevant workflow card and click Edit eSigners.

- Update the internal and/or external signatories as desired.
- Click Request Signature to save the changes.
Note: Only users with administrator permissions can add new external signatories inline with the Add New button. For more information, see User Role and Permission Definitions.
Cancel the eSign Process
To cancel an eSign process after it has been initiated, open the workflow card and click Cancel eSign.

You can enter a reason for cancelling, and notify each eSigner if required. This process can be reinitiated at a later time by clicking Restart.
Note: Cancelling an eSign will transition the workflow card based on the If Declined transition rule, if all other eSign processes are no longer active. If the cancelled process is the only one, or if any other eSign process remains active, the card will not transition.
eSign The Document
Signatories can click Review & eSign directly from the notification email they receive, and don't need to log in to Gatekeeper to complete this process.

Note: The internal signatory can access the file directly from the notification email they receive, or click eSign Now from the associated workflow card.
- Click Scroll to eSign.

- The Signatory can then
- click CLICK TO SIGN directly within the document

- click SIGN HERE at the bottom of the page

- click Decline if needed.
- click CLICK TO SIGN directly within the document
- Complete the eSign using one of the following methods:
- Draw it in: Drawing their signature using a mouse or touchscreen
- Type it in: Typing in their name and selecting a font style
- Upload Image: Upload an image of their signature
- Saved: Returning signatories will be able to access saved signatures
- Once the signature is complete, click Save.
- Click on the signature to be used, then click Insert Everywhere.

- Click I Agree to complete the eSign process.

Other signatories who have not signed the document will be sent an email notification in the designated order. External signatories will follow the same process as outlined above.
Once all parties have completed the eSign process, they will receive confirmation emails with an attachment to download a copy of the signed document.

For further guidance on monitoring the eSign process, see Track eSign Progress.
Delegate External eSignatories
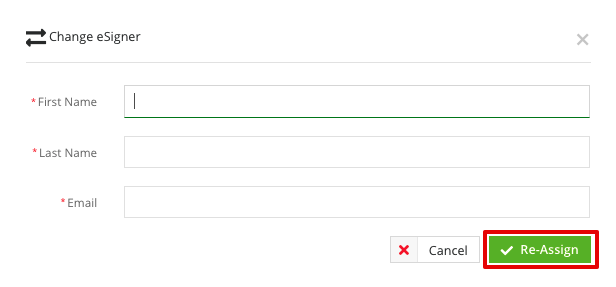
External signatories have the option to delegate eSign to someone else by clicking Change eSigner in the notification email.

Alternatively, they can click Change Signer after opening the file.

They must enter the full name and email of the new eSigner, then click Re-Assign.
Multiple eSign Processes
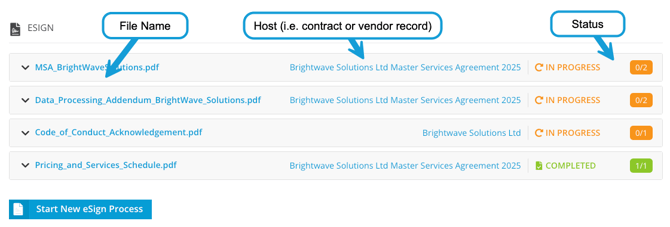
If multiple files are associated with a workflow card, you can start a separate eSign process for each one. This allows you to manage all eSignatures for a contract in one place and streamline the execution process. To begin another eSign process, click Start New eSign Process for each file and configure them separately.
Each eSign process displays separately, with a summary showing the file name, host, and status. Expand a section to view further details and manage the process.
Configuration
To configure a workflow phase for eSign:
- From Actions, select the Enable eSign checkbox.

- Select the Inline Only eSign checkbox to prevent documents from being sent until floating fields (e.g. signature, name, title) have been placed.
- Select the Display Approval History to show internal signatories all workflow approvals for the card.
- From Form Access, select the relevant owner who should be responsible for initiating the eSign process.
- From Notifications, enable the toggle for the card owner, and click the pencil icon to amend the template. This will send an email to let the owner know there is a document that is ready to be configured and sent for eSignature.

- From Transitions, select where the card should move when the eSign process completes successfully, or is declined. See the FAQ for more information on transition logic in eSign phases.
- Configure any additional settings, such as an SLA, as required.
Note: Configuring a transition for the eSign Declined outcome is optional, leaving this unset allows for the document to be updated and the signature process to be restarted if necessary. This is only possible if the workflow card remains active and has not been archived.
eSign Handlebars
eSign handlebars can be configured within eNegotiate contract templates. This automatically places signatures for both internal and external parties as well as associated names, job titles, company and dates within a document.
As the handlebars are embedded into the Word template itself, they are fully dynamic and can adjust for any length of text or for additional clause language inserted from our Clause Library.
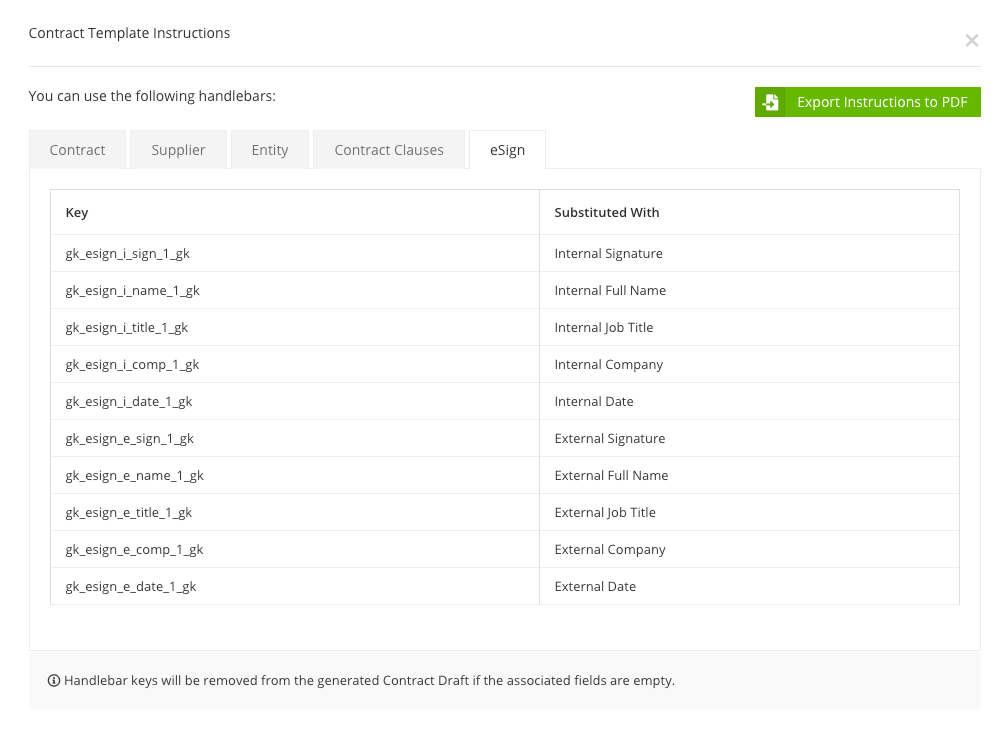
When creating or editing a contract template, click Handlebar Instructions to see the list of available handlebars that can be added to your contract templates.

Enter the relevant Key in your document in the appropriate position before uploading it as a template in Gatekeeper. The Key will then be substituted with the relevant metadata entered into the form where available.
You can click Export Instructions to PDF as needed:
Note: Handlebars will only work for templates added via the eNegotiate Templates area, and will not function for files manually uploaded to Gatekeeper.
Add Additional eSign Handlebars
The eSign tab of the Handlebar Instructions only shows the handlebars for a single internal and single external signatory. However, if you have more than one internal and external signer, you can increment the 1 from the above handlebars to include additional signatories.
For example, the screenshot below shows a template contract with handlebars for two internal and two external signers

Note: Gatekeeper automatically removes unused handlebars during signing, so no gk_esign_i_sign_NUMBER_gk references will be left in the finalised contract document.
FAQs