
Sections in this article:
- What are Webhooks?
- Configure Webhooks
- View Webhook Events
- Edit a Webhook Subscription
- Delete a Webhook Subscription
- Reactivate a Disabled Subscription
Watch the video for a demonstration of webhooks:
What are Webhooks?
If you are familiar with coding, you can use webhooks to be notified automatically when a contract or vendor status changes in Gatekeeper.
A webhook allows one application to send event notifications to another application in real time.
For example, you might want to notify a third-party system, such as an ERP, when a new vendor is approved in Gatekeeper. The third-party system can then retrieve data about that vendor via the API.
Instead of making repeated calls to pull data frequently from the Gatekeeper API, Gatekeeper automatically sends a notification when a specified event occurs. This allows events to be synchronised to your other apps instantly while reducing unnecessary API traffic.
Supported Webhook Events
Gatekeeper can send notifications for the following events:
|
|
Note: For Status Updated events, the notification payload reflects the record's new status. For example, a Pipeline to Live transition sends a payload showing the record as Live.
Configure Webhooks
To create a webhook in Gatekeeper:
- From the navigation menu, expand Settings, then click Configuration.
- Click Webhooks.
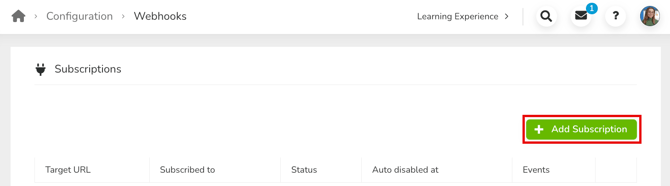
- Click Add Subscription.
-
Complete the following details:
- Target URL: The URL where Gatekeeper will post event notifications.
- Meta Status: Select Live, Pipeline, or Archived. This controls whether the subscription itself is active, not which records trigger it. Only live subscriptions send webhooks.
-
Event Kinds: Select the checkboxes for the events you want to subscribe to. You can either create separate subscriptions for different events, or select multiple events into one subscription.
- Once finished, click Save.
The new subscription appears in the list on the Webhooks page.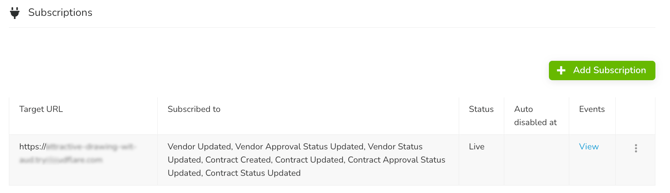
Note: Webhook subscriptions can also be created and managed via the API, using the /webhooks/subscriptions endpoint.
Access the Secure Token
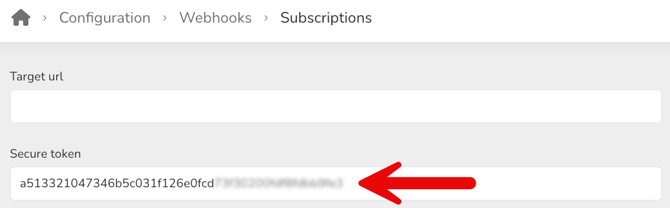
Gatekeeper secures webhooks using challenge-response authentication. This verifies that the recipient is authorised to receive the event notifications.
The Secure Token can be copied when configuring the subscription in Gatekeeper, and entered into the receiving system's webhook configuration. The third-party system can then validate that incoming event notifications were sent from Gatekeeper by checking that the secure token matches.
View Webhook Events
Once a webhook is configured, you can monitor the notifications sent from Gatekeeper to your target URL.
To do this, from the Webhooks configuration page, click View in the Events column.
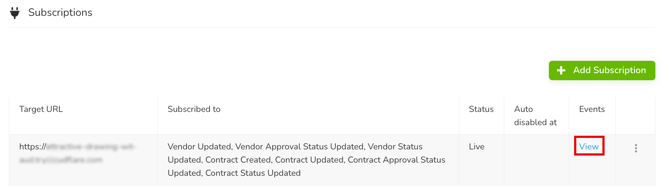
This displays a log of events, which can be used to verify that events are sent as expected and to help diagnose any issues. Click the 3 dots to view further details.

For more information, see the Gatekeeper API article.
Edit a Webhook Subscription
To edit a webhook subscription:
- From the Webhooks configuration page, locate the subscription in the list.
- Expand the 3 dots, then select Edit.
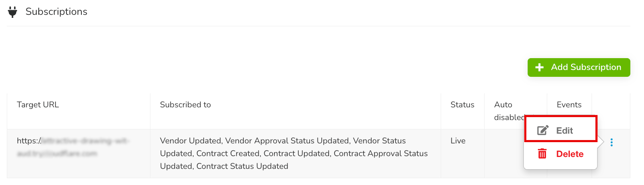
- Update the required details, then click Save.
Delete a Webhook Subscription
To delete a webhook subscription:
- From the Webhooks configuration page, locate the subscription in the list.
- Expand the 3 dots, then select Delete.
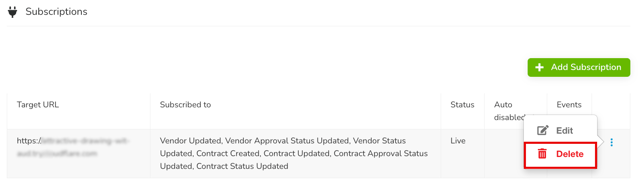
- Click OK to confirm.
Reactivate a Disabled Subscription
Gatekeeper disables a subscription immediately if the target URL returns an error response, such as an invalid or unreachable URL. For timeouts or connection errors, it retries with backoff for up to 7 days before disabling.
When disabled, the Meta Status is set to Pipeline and the time is recorded in Auto disabled at. To reactivate, set the Meta Status back to Live by editing the subscription. This clears the timestamp and re-runs the challenge-response validation.