
![]() Estimated Read Time: 6 Minutes
Estimated Read Time: 6 Minutes
Sections in this article:
- Where Can Files Be Added?
- Add Files to a Record
- Add Versions to Files
- Rename Files
- Set a Master Record
- Who Can Upload/Edit Files?
Where Can Files Be Added?
See the table below for details on where users can upload files in Gatekeeper:
| Type | Maximum File Size |
|
The Files tab on the following records:
|
200MB |
| As an attachment to messages and workflow messages | 200MB |
| Via Lumin Extract and Lumin Intake | 50MB |
| eNegotiate contract drafts on a workflow | 50MB |
| eNegotiate contract templates (including a PDF preview) | 10MB |
| Custom data fields, and workflow-only form fields (using field type Attached File and Attached File with Expiry Date) | 200MB |
Note: Files sent via email are subject to a 25MB size limit. This applies to emails sent from Gatekeeper, such as message attachments and eSign documents, as well as files submitted to Gatekeeper, such as Lumin Intake via email.
Valid File Types
For security and functionality reasons, Gatekeeper only allows the upload of certain file types.
Note: Special characters (e.g., ! ? £ ' " @ # $ % ^ & *) are not accepted in the file name field. Use only letters, numbers, and standard punctuation.
Below is a list of the most common file types which are accepted by Gatekeeper.
- .pdf: These can also be viewed in Gatekeeper's native PDF previewer
- .docx: These can also be viewed/edited in Gatekeeper's native Office For The Web feature
- .doc
- .xls/xlsx
- .ppt/.pptx
- .zip
- .jpg/.png
The following file types cannot be uploaded into Gatekeeper:
- .exe
- .js
- .sh
- .sql
Note: Gatekeeper cannot upload an encrypted document, or emails containing an encrypted document.
Add Files to a Record
To learn how to add files to a record, watch the demonstration or follow the steps below:
- From the navigation menu, click the relevant option (for example, expand Vault then click Vendors, Contracts, Projects, or Entities) depending on where you wish to store the file.
- Open the record that you would like to add the file to.
- Click the Files tab.

- Click the Add File icon.

Files can then be added by:
- Uploading a file from your device
- Connecting files through Google Drive or OneDrive
- Attaching a file link
After uploading, you can review the file details, edit the metadata, preview PDFs, or add and organise folders to keep your files in order.
Upload a File From Your Device
To upload a file from your device:
- Click Upload and locate the relevant file on your device.
-
To select multiple files to upload at once, select all relevant files by holding down ⌘ (MAC) or Ctrl (Windows).
-
-
If required, click Add Details and select a File Type and Expiration Date, then click Update.
-
Click Add this File to confirm the upload.
Google Drive
To add a file from Google Drive:
- Click Google Drive.
- Navigate through the tabs in the dialogue window to find the file you’d like to upload.
- Click on the relevant file, then click Select.
- If required, click Add Details and select a File Type and Expiration Date, then click Update.
- Click Add this File to confirm the upload.
For further details on attaching a document from Google Drive for the first time, see Linking to Google Drive for attachments.
OneDrive
To add a file from OneDrive:
- Click OneDrive.
- Navigate through the tabs in the dialogue window to find the file you’d like to upload.
- Click on the relevant file, then click Select.
- If required, click Add Details and select a File Type and Expiration Date, then click Update.
- Click Add this File to confirm the upload.
File Link
To upload a file using a hyperlink:
- Click File Link.
- Enter the URL of the file, and select a Type from the dropdown list.

- Complete the remaining fields as required. These are all optional fields.
- Title: The name of your file.
- File Type: This is an editable list for your categorising purposes. This list can be modified in the Dropdown Lists configuration options.
- Expiry Date: The date when the file expires or is no longer relevant to the record (such as the expiry date of certification).
- Description: A description of what the file contains.
- Click Save.
- Click Add this File to confirm the upload.
Add Versions to Files
You can upload new versions of a file. To do this:
- Expand the 3 dots on the relevant file, then select New Version.
- Click Choose file to locate the new version on your device, then add a comment if required.
- Click Submit.
Once saved, you can click View History to see the full version history of that file.
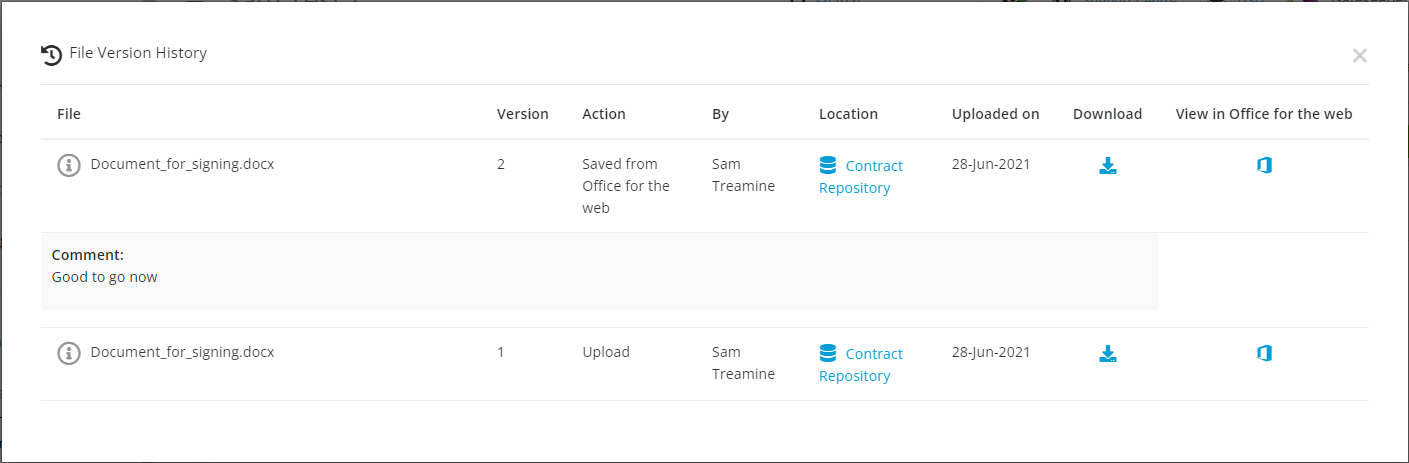
Note: You can view and download all previous file versions from this screen.
Rename Files
To rename existing files:
-
Expand the 3 dots on the relevant file, then select Rename.
-
Enter a new file name.
-
Click Update to save your changes.
Note:
- Special characters (e.g., ! ? £ ' " @ # $ % ^ & *) are not accepted in the file name field. Use only letters, numbers, and standard punctuation.
- Files associated with an eSign process or marked as the master record cannot be renamed.
Set a Master Record
A master record is only available within a contract record, and is generally reserved for the executed agreement associated with the contract.
Note: With a master record selected, you can leverage LuminIQ to display the contract summary and obligations. See LuminIQ - Generate Lumin Insights for more information.
- Expand the 3 dots on the relevant file, then select Edit.
- Select the Master Record checkbox, then click Update.

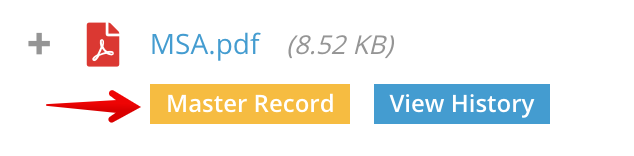
All files designated as master records will have a corresponding label.
Note: Files uploaded within a custom data group marked as sensitive cannot be selected as the master record.
View the Master Record
In addition to the Files tab, the master record will be displayed at the bottom of the Data tab within an embedded viewer. There are options to search, navigate, print, download, and/or rotate directly from the viewer.

Who can Upload/Edit Files?
Adding Files
- Any user with access to a contract/vendor record in the Vault can add a file to that record.
- Only Global Administrators can upload files to Lumin Extract.
- Other methods of adding files (i.e. as via workflow form attachments) will depend on whether a user has been granted access to the specific form on the workflow. See Workflow Authorisation Overview for further details.
Editing Files
- Global Administrators can edit/delete/rename any file in Gatekeeper. This includes changing file data (like the Type/Expiry Date) and setting the master record.
-
Non-Global Administrators (i.e. Own Team, Owned Only or RBAC Admin Group Users) can edit/rename files for records that they can access. They cannot delete a file unless they are the owner of that file i.e. if they uploaded it to Gatekeeper, or if ownership is transferred to them.
-
Collaborators can only edit/delete files that they own i.e. that they uploaded to Gatekeeper. All other files they have access to are read-only.
Additional Reading
- File Repository Overview:This covers the File repository in Gatekeeper, allowing you to view all files uploaded across the whole system.
-
File Expiry Dates: Learn more about setting and using expiry dates for your files.