
![]() Estimated Read Time: 15 minutes
Estimated Read Time: 15 minutes
Sections in this article:
Note: This article focuses on setting up SCIM integration using Okta. For generic information on SCIM, including best practices and troubleshooting steps, refer to the Introduction to SCIM Integration with Gatekeeper.
What is SCIM?
SCIM (System for Cross-domain Identity Management) is an open standard used to automate the provisioning and management of users. It enables identity providers (IdPs), such as Okta, to securely synchronise user data with Gatekeeper, helping to ensure consistency and reduce manual tasks.
Supported SCIM Operations
- User provisioning (Create, update, and delete)
- User activation and deactivation
- User profile synchronisation
- Group push (Create, update, and delete)
Note: The User Import SCIM operation in Okta is not supported by the Gatekeeper Okta application.
Configuration
Permissions Required for Setup
To follow the steps, you’ll need:
- An Okta account.
- Appropriate admin roles in Okta (i.e. to create applications and manage group assignments).
- Global Administrator permissions in Gatekeeper, with the Configuration additional permission.
Step 1: Set the Fallback Team and Mapping
The fallback team is where users will be assigned if their groups or permissions are deleted. The default mapping should grant only minimal permissions. To do this:
- From the navigation menu, expand Settings then click Configuration.
- Click System for Cross-domain Identity Management (SCIM).
- Select the relevant team from the Select Fallback Team dropdown list.
- Click the
 pencil icon on Default Mapping.
 - Select the relevant permissions, then click Save

Additionally, you can control the default email report preferences applied when a user is first provisioned via SCIM. To manage this, enable or disable the Owned by Me and All Reports toggles as required.

Note: These settings apply only the first time a user is provisioned. Gatekeeper will not overwrite the saved preferences of existing users.
Step 2: Set Up the Application in Okta
The next step is to create a new application in Okta to enable the SCIM connection with Gatekeeper.
- Log in to the Okta Admin Console.
- Navigate to Applications.
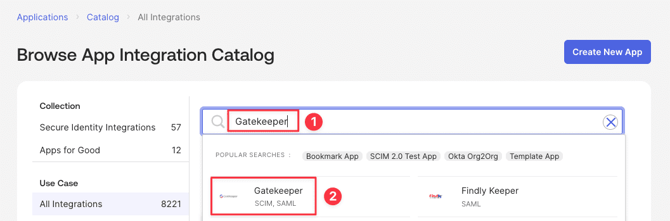
- Click Browse App Catalog.

- Search for Gatekeeper
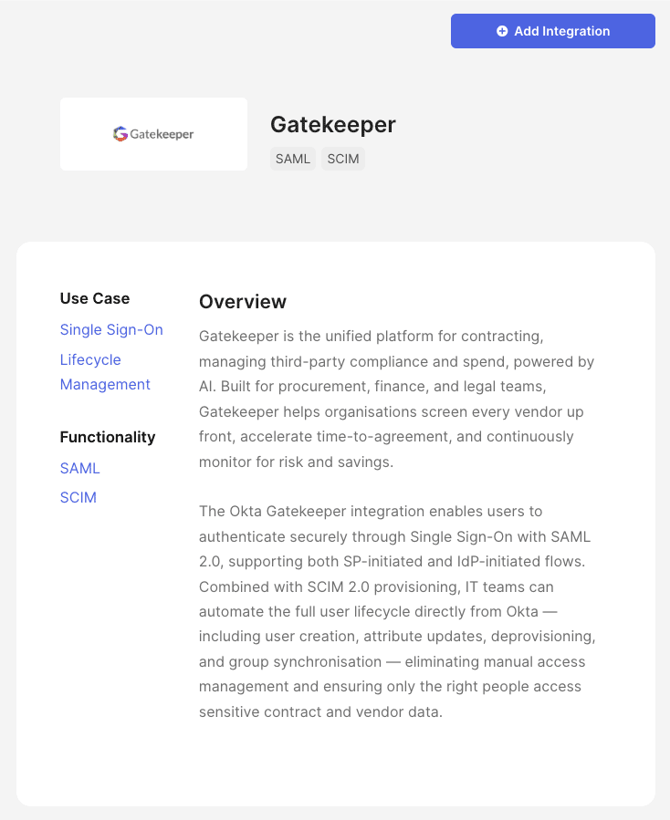
- Click the official Gatekeeper Okta application.
- Click Add Integration.
- Fill in the following required fields:
- Application Label: Give the application a meaningful name.
- GK Region: Enter the region value from your tenant's URL. This field is case-sensitive. Available values are: apac (Asia-Pacific), ca (Canada), eu (EMEA), us (United States). For example, the value from
https://eu.gatekeeperhq.com/3222/executive-dashboardis eu. - Tenant ID: Enter the numeric ID from your tenant's URL. Ex: the value from
https://eu.gatekeeperhq.com/3222/executive-dashboardis 3222.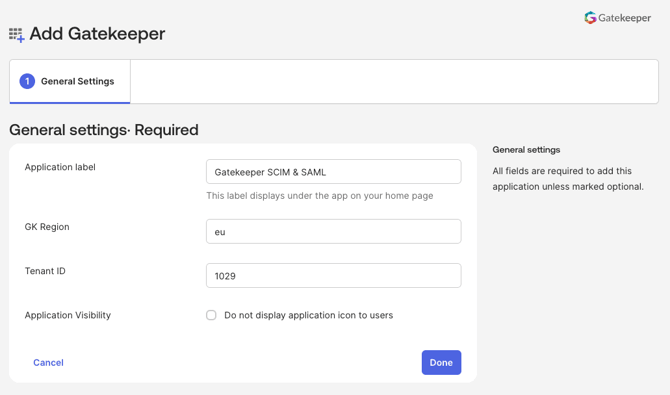
- Click Done.
Step 3: Configure Okta SSO
To enable user login using Okta, you must configure the Okta SSO Application and Gatekeeper. To do this, follow the instructions in Configure Okta SSO.
Step 4: Configure SCIM Provisioning
With SSO configured, the next step is to set up SCIM provisioning to automate user management between Okta and Gatekeeper.
- In your Gatekeeper tenant, from the navigation menu, expand Settings, then click Configuration.
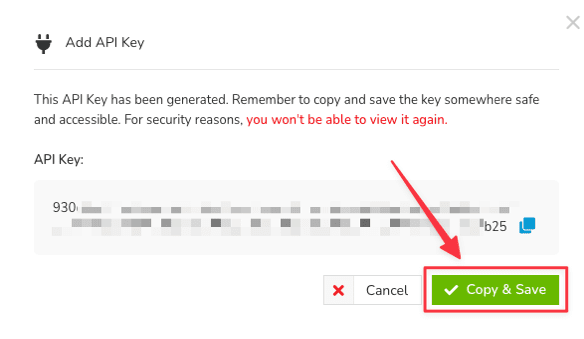
- Click System for Cross-domain Identity Management (SCIM), then click Generate API Key.
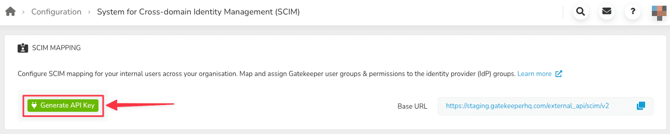
- Copy the API Key. For security reasons, you won't be able to view the key again after clicking Copy & Save.
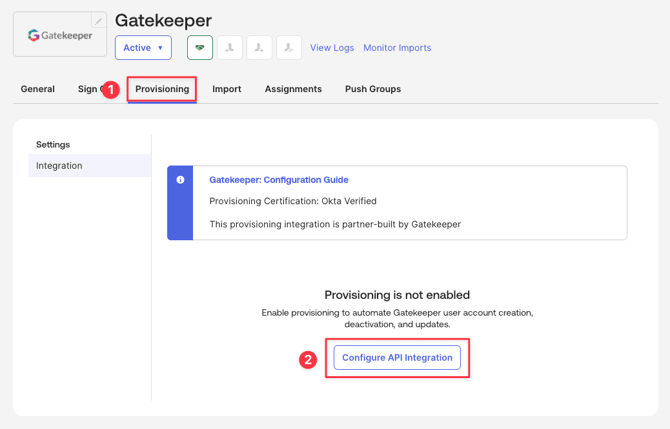
- Return to Okta, then navigate to the Provisioning tab and click Configure API Integration.
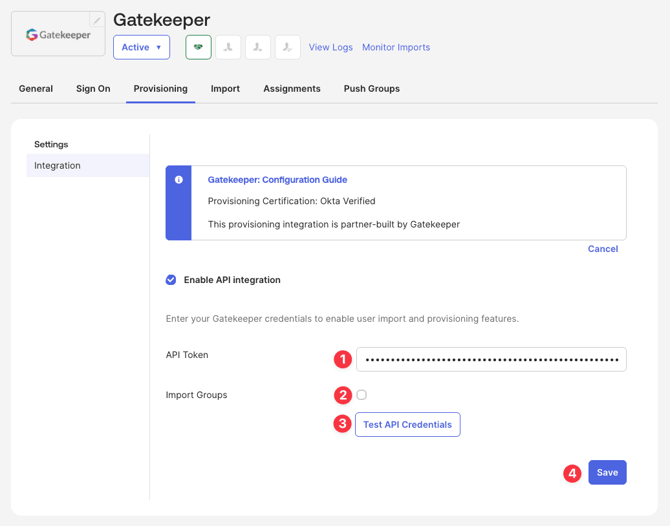
- Configure the settings as follows:
- Enter the generated API Key into the API Token field.
- Deselect the Import Groups checkbox
- Click Test API Credentials.
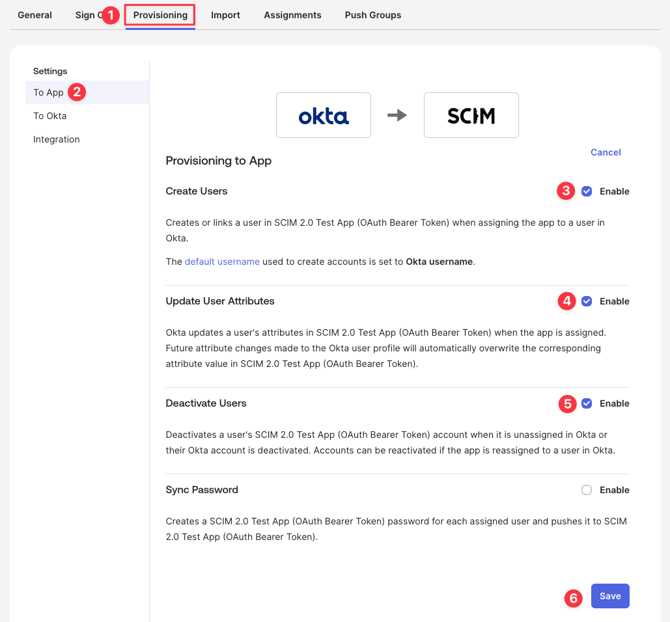
- From the Provisioning tab, navigate to To App to configure the following settings, then click Save:
-
- Enable Create Users.
- Enable Update User Attribute.
- Enable Deactivate Users.
- Disable Sync Password. Users will use SSO to log in.
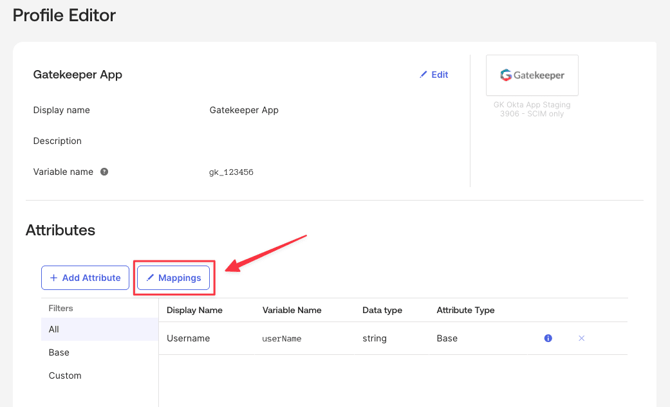
Step 5: Gatekeeper Team Name Attribute
By default, Gatekeeper creates the team name attribute and maps it to the Department attribute automatically. To change this mapping, within your Okta application, navigate to Profile Editor, then click Mappings.
Note: The department/alternative attribute name in Okta must match the team name in Gatekeeper exactly. This match is case sensitive.
Step 6: Assign Users or Groups
Once provisioning is configured, you can assign users or groups to the SCIM-integrated application in Okta.
- You cannot rename a SCIM-provisioned group directly in Gatekeeper. Group names are controlled by the IdP, and update automatically when changed in Okta.
- You cannot manually add or remove members from a SCIM-provisioned group in Gatekeeper. Membership is managed in Okta, and pushed to Gatekeeper via the group push operation.
Step 7: Verify Provisioning in Gatekeeper
After assigning users or groups in Okta, verify that they have been successfully provisioned into Gatekeeper.
- In Gatekeeper, from the navigation menu, expand Settings then click Configuration.
- Click System for Cross-domain Identity Management (SCIM).
- You should see the provisioned group and user appear. The system applies the default permissions initially.
- Click the
 pencil icon for the group to configure group permissions (e.g. Global Collaborator or Administrator), then click Save.
Note:
- If a user is already synced, and you later update their group’s permissions, the user will automatically inherit the new permissions.
-
When a user belongs to multiple groups, Gatekeeper will:
-
Merge all assigned permissions.
-
Grant the highest privilege level among all groups.
For example, a user in both Global Collaborator and Global Administrator groups will be assigned as Global Administrator, as this is the highest permission.
-
Manage Groups in Gatekeeper
You can manage groups in Gatekeeper:
- From the navigation menu, expand Settings, then click Configuration.
- Click System for Cross-domain Identity Management (SCIM).
Once a group has pushed from Okta, it will appear in the table.
Edit Mappings for IdP Groups in Gatekeeper
To manage the permissions that will apply to users in that group:
- Click the pencil icon on the relevant group.

- Select the groups and permissions required.
- Click Save.
Note: The IdP groups can be assigned:
-
both RBAC access groups and standard roles and permissions
View Users in an IdP Group
To view which users have been synced as part of an IdP group, click the name of the IdP Group.
The table displays all active and pending users belonging to this IdP Group. Archived users are not displayed. The following information is included to help with troubleshooting and group membership audits:
- Name: click this link to navigate to the user's profile page
- Status: Active or Pending
- Team: the Gatekeeper team the user belongs to
- Other IdP groups: all other groups the user is a member of
- SCIM ID: the unique identifier assigned by the IdP

Remove Users
You cannot manually add or remove members from a SCIM-provisioned group in Gatekeeper. Membership is managed in Okta, and pushed to Gatekeeper via the group push operation. Removing a user from the group in Okta will revoke their Gatekeeper access.