
Discover how to add and invite external users to collaborate on Workflows via the Vendor Portal
![]() Estimated Read Time: 4 Minutes
Estimated Read Time: 4 Minutes
Sections in this article:
- Part 1 - Configure the Form
- Part 2 - Create/Update the Vendor Record
- Part 3 - Configure the Invitation Phase
- Additional Steps
You can use the Vendor Portal as part of your onboarding process to collect key documentation from vendor contacts. For new vendors, you’ll often need to add and invite them to the portal. While there are multiple ways to do this (see Invite Vendor Users), the most efficient method is to do so within the same workflow used for onboarding reviews. This allows vendor users to be added and invited automatically as the form progresses, so they're ready to collaborate as soon as their input is required.
Note: The steps below show how to configure vendor user invitations in a workflow. They can be built into an existing workflow, as long as the steps are followed in the order listed.
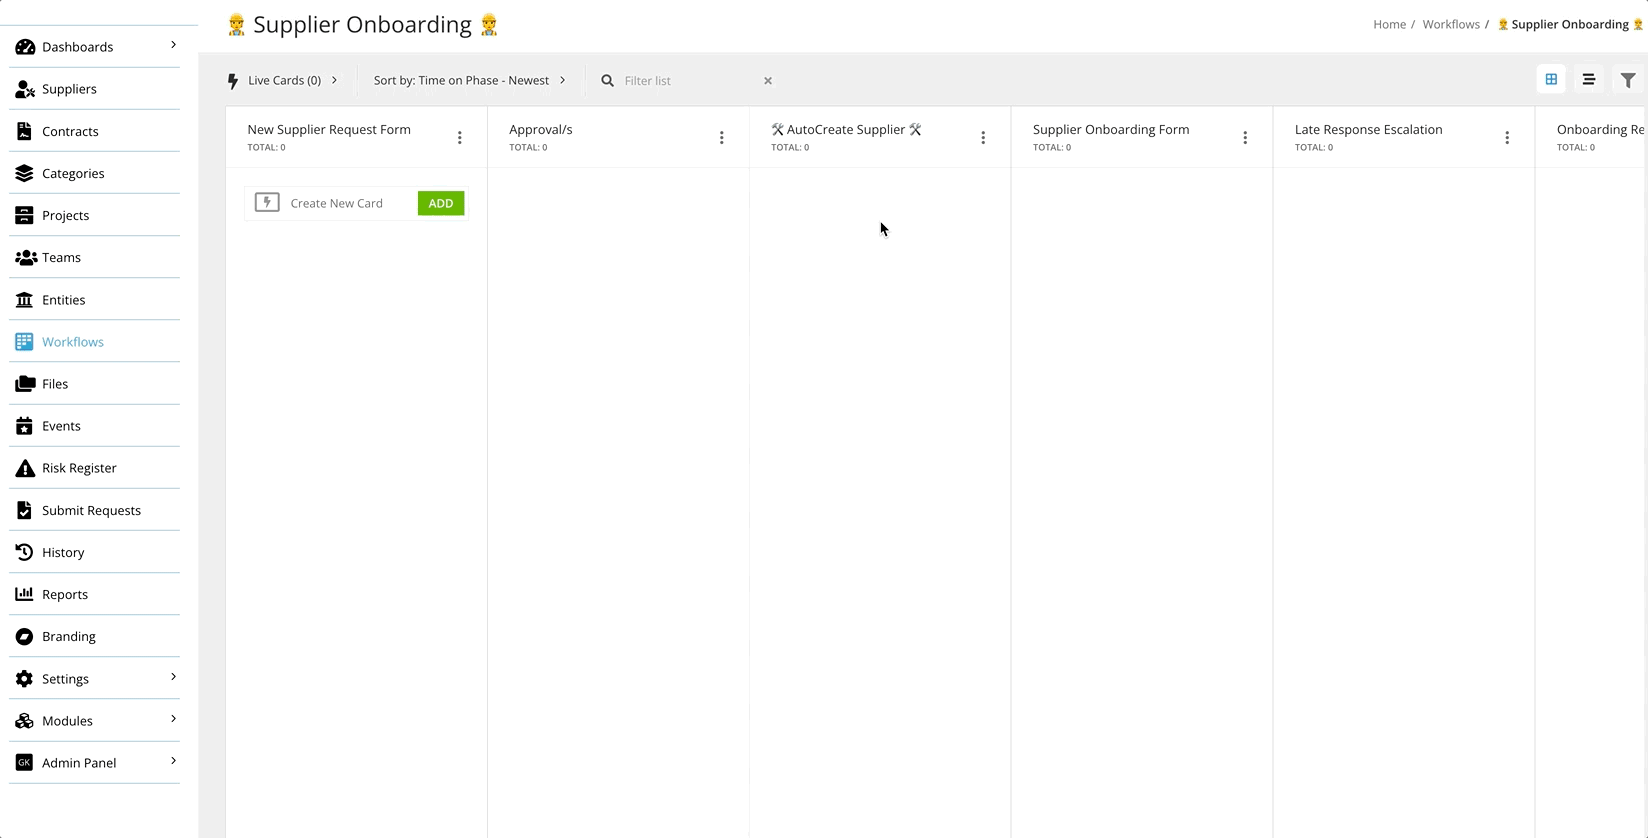
Part 1 - Configure the Form
To associate a vendor record and add a vendor user to a workflow card, you'll need to add the Predefined Vendor Data Section to your workflow form:
To do this:
- Open the workflow and click on the start phase to edit it.
- From the Form section, click ADD SECTION.
- Enter a name for the section. This will be shown and formatted as a heading on the form.
- Select Vendor from the Predefined dropdown list.
- Once finished, click Save.
Note: For the rest of the configuration to work, the Vendor Contact field must be populated before the workflow card reaches the phases outlined in Part 2 and 3 of this guide.
To enforce this, it's recommended to configure the field as mandatory in the initial request form, or during another stage provided it is done before Part 2.
Part 2 - Create/Update the Vendor Record
Once this Vendor and Vendor User exist on the form, the next step is to convert them into records in your Gatekeeper repository.
- If this is a new vendor request, use the ⚙️AutoAction | Create Vendor, or select the Create Vendor action to do this manually.
- If the vendor record already exists and the Vendor User is populated in the form afterwards, use the ⚙️AutoAction | Update Vendor, or select the Update Vendor action to do this manually. This ensures the new user is linked as an owner on the existing record in the repository.
Part 3 - Configure the Invitation Phase
Once you have a Vendor Record with a Vendor Owner, you can configure an action to invite them to the portal:
- On the relevant phase, click the Form Access section, then select the Vendor Portal and Vendor | Owner radio buttons.

- Click the Actions section and select the Invite/Notify Card Owner to the Portal checkbox.

- As this is the phase your Vendor user will access, click the Form section and ensure that the Editable radio button is selected for any sections that require their input.

Additional Steps
Amend the Default Invitation Email
When the invitation email is sent, vendor users will receive an email with the following wording:
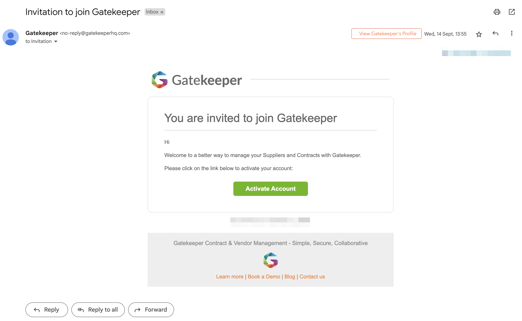
It's recommended to change the default wording to give your vendor users context as to what the invitation means. See Customise the Vendor Portal Invitation for step-by-step instructions.
Test the Workflow
Once you've configured the workflow, it's recommended to add a test vendor record and vendor user using an email address you have access to. This allows you to validate:
- that the workflow has been configured correctly
- that the vendor experience functions as expected
See Testing the Vendor Portal for more guidance on adding users for testing purposes.